Trellis for the winter melon plants

My latest take on the A-frame trellis.

Growing the winter melon plant for the first time, I have no idea what to expect of it, but I figured I couldn’t go wrong with an A-frame trellis.

I was running a little low on building materials at that time, so this trellis ended up being a shorter one, at about 1.7 metres high, since those were the longest poles I had on hand then.

Once again, the ‘A’ was made of the thin metal poles. Since I was short on metal poles then, I used bamboo sticks for the horizontal supports – one across the top, and one near the base on each side.

I also used my trusty cable ties to keep everything tightly secured, but also tied the joints with white twine.

Next, because I didn’t have more poles, I decided to use the white twine to create grids for the plants to attach themselves to. As the winter melon plant is a climbing plant, I wanted to have smaller grids for it to reach out and attach to. So – this is where my fun began – I decided to make the grids out of twine.

I started with the vertical bits first, tying one end of the twine to the bottom horizontal bar and looping it around the top bar before tying it off to the other bottom horizontal bar. I did it this way because I wanted to minimize the number of strings and knots I would have to tie. It was also much easier and neater to do.

One thing to note is that it’s important to pull the twine taut before tying it off, otherwise it will sag later under the weight of the plants. Been there, done that, and it wasn’t pretty.

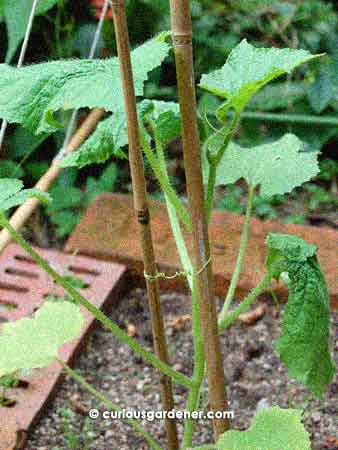
The way the horizontal twine loops around the vertical twine.

After completing a set of vertical strings, it was time to do the horizontal ones. These were a little more fun to do because after tying it off on one side, I looped it around each vertical string as I stretched it to the other side. Looping it would give more support rather than just stretching the string across from one side to the other. Again, I pulled the twine tight before tying it up. Soon, I ended up with a grid that was similar to a football goal! It is of course your choice how to space the grids. I experimented with squares on one side and rectangles on the other by decreasing the number of horizontal strings.

One drawback about using twine is that it will disintegrate within 6 to 12 months when left out in the elements. Our heat and rain speeds up the decay process, and I noted that twine would only be suitable for one or two growing seasons at most – that’s less than 12 months.

A good thing about making a smaller trellis was that I didn’t have to construct it on site. I made the ‘A’ sides first, then attached the top horizontal pole – which sort of held them together in a wobbly way – before attaching the lower horizontal poles. It was admittedly still a bit wonky when I completed the construction, but once I anchored the legs by burying them a bit and adding stones around them, the trellis stood sturdily enough. Whether the A-frame is suitable for winter melon plants remains to be seen, but I’m always game for a challenge.

© 2011 curiousgardener.com All rights reserved

$1.99 Domains* at GoDaddy.com

Share

Growing winter melon plants – phase 1

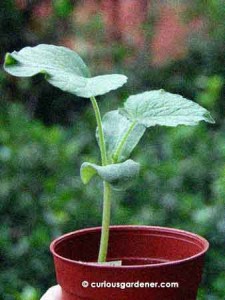
The first true leaves of the winter melon plant.

A few months ago, I exchanged veggie seeds with Novice Gardener and expanded my repertoire in directions I would probably not have tried just yet. When I started growing edible plants, my initial plan was to start with those that I knew would grow well locally – and honestly, I didn’t consider growing gourds. But, when my “goodie bag” from Novice Gardener arrived, I was intrigued to find winter melon seeds among the other surprises inside. Cool, I thought, and happily sowed a pair of seeds the following weekend. Knowing nothing about the plants was actually an attraction for me because then, there would be that sense of adventure of watching the plants grow and develop. Optimistically speaking, of course.

Both seeds germinated in less than a week and proceeded to grow quite vigorously. Fortunately for them, I built their trellis fairly quickly, and planted them out when they had only two pairs of true leaves.

That’s pretty quick, by my normal standards, and I expected the plants to keep growing as vigorously as they had in the small pots. Surprisingly, though, they slowed down – a lot. Maybe they needed to adjust to the new soil composition (from Tref in the pot to garden soil mixed with organic compost and bonemeal), or maybe they needed time to expand their root systems. In the meantime, the rainy weather started, and one of the two plants died out. This made me nervous, because that was when Novice Gardener mentioned having difficulty germinating these seeds. I crossed my fingers, toes, arms and legs hoping that the surviving plant wouldn’t give up, either.

The first tendrils take hold. Notice the sad leaves, too?

Fortunately, the plant is still chugging along. It seems to be picking up momentum now, but is attracting yellow aphids. Thanks to my experience with the aubergine plant that was also infested with aphids but got that under control when ladybugs came to feast on them, I’ve stuck to my organic guns and haven’t sprayed any insecticide yet. This will be the proof for me to see if the ladybugs are attracted only by the aphids, or a combination of plant and pest. The “ladybug brinjal plant” is less than 2 metres away and I’m hoping some of the ladybugs migrate soon.

In the meantime, the plant is still growing, albeit with sad-looking leaves, no thanks to the aphids. I was so focused on the state of the leaves that I failed to notice when the first tendrils emerged. There are several now, latched onto the sticks meant to guide them upwards to the trellis. It shouldn’t be long before the plant reaches the trellis proper.

Since this seems to be such a slow growing plant now, I’ve planted a couple of regular long bean plants on the other side of the trellis, where the first winter melon plant died. I normally shy away from letting edible creeping or climbing plants share growing space, but these long bean plants have a short life – they’ve already peaked the trellis, have flowered and started fruiting; in a month or so, they’ll be dying off, and if my timing is right, the winter melon plant will be near the top (so I hope). But, even if they end up growing together, I’m fairly sure there will be no cross-pollination issues as they’re from different plant families. We’ll see.

I’ll also be observing how the winter melon plant grows so I can do better by the plants the next time. Hopefully this trellis will be suitable enough for it to grow on. It’s my A-frame design on a shorter scale. Anyway “first children” are usually the guinea pigs – we’re not sure of the best ways to nurture them, but we try our best.

© 2011 curiousgardener.com All rights reserved.


Share

The Great Bangkwang Experiment – concluded!

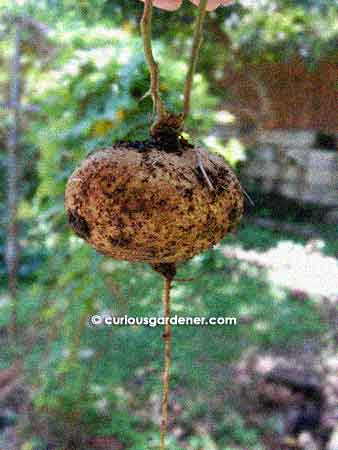
The harvested bangkwang tuber!

Last year, I wanted to try growing the turnip-like bangkwang – also known as jicama or the yam bean. To get that going, I bought a small tuber from the wet market that still had a fresh-looking stem attached. I planted it, and it grew and flowered, giving me seeds that I then planted (or in a couple of cases, were dispersed by the explosive action of the seed pods). The plants have been growing for over a year now.

Earlier in June, I discovered that the plants had indeed been producing tubers – one tuber each, to be precise. It was so exciting to actually see what is meant by a “tuberous root”. (Have I not already admitted I’m a Doubting Thomas? Seeing is believing!)
Since then, it’s been a matter of waiting while the tubers grew…

Over this last weekend, I realized that the bigger of the two known tubers was peeking out at me. Maybe the heavy rain we’ve been having eroded the soil to expose the tuber.

Whatever the case, I decided to harvest it, finding that it had almost tripled in size since I last peeked at it. It was now about 14cm wide, with nice smooth skin and a thin, long tap root that didn’t give resistance when I pulled it out. Like all our other home-grown veggies, this was incredibly sweet to the taste! We must grow more…

© 2011 curiousgardener.com All rights reserved.


Share

Finally – green aubergines!

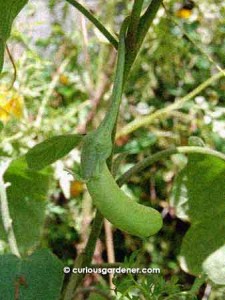
Our first baby green aubergine!

I sowed seeds for both green and purple aubergine or brinjal plants at the same time, but for whatever reason, the green aubergine plants lagged way behind the purple ones. The purple plants grew, flowered and fruited faster, with the first purple brinjal making its grand entrance in early September. Now, finally, I can unveil its green cousin, the baby long green brinjal!

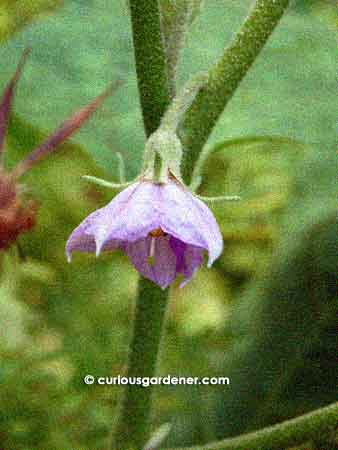
Being of the Solanaceae family, the flowers resemble those of chillis and tomatoes – and look identical to the purple eggplant flowers in every way that I can see. This caused me a huge headache because I wasn’t sure which plant was which variety while they were growing. But, now that the first fruit has started growing – and it’s staying a nice pale green, unlike the purple brinjals that turn and remain purple after the initial growing stage – I finally know for sure that we have at least one green brinjal plant growing.

Flower of the green eggplant - looks exactly like that of the purple eggplant to me!

What a relief!

The funny thing is, I had planted a few yellow cosmos plants near this pair of brinjal plants to act as pollinator attractors (besides that, they’re pretty plants!). The cosmos plants grew so fast that they soon towered over the two aubergine plants, and then when the rainy season came along, the cosmos plants naturally leaned over because they were so top-heavy, and covered the brinjal plants.

Now, if you think about plant psychology, this may have helped, because the aubergine plants may have felt threatened and decided to finally take action to reproduce themselves! Whatever the reason, I’m thrilled to finally start seeing fruits of my labour – and I’m interested to see exactly how long these fruits will grow to be. After all, the short purple brinjals were drattedly short. Will the long green brinjal live up to its name?

© 2011 curiousgardener.com All rights reserved.


Share