The yellow ladybugs

First view of the intriguing yellow ladybug on the underside of the leaf of the angled loofah plant.

I have become such a ladybug stalker that my eyes immediately zoom in on every tiny round bug or nymph-like creature on the plants as I roam about the garden.

Just last week, I saw two yellow ladybugs on the angled loofah vine. I was thrilled, because I thought they were newly-hatched ladybugs. Arming myself with the camera, I kept visiting the plant every half hour or so, hoping to catch the process of the colour change in camera pixels. Unfortunately, it was already late evening, and after two hours, they didn’t seem to undergo any drastic colour changes. Disappointed, I had to retire with the dying light and hope they would still be there the next day.

There were several very fine passing showers the following morning, so I didn’t get out to the loofah plants until late afternoon. I was pleased to find the two ladybugs still around, and they were still bright yellow.

A more advanced nymph - the younger ones are skinnier and more colourless.

Before I could ponder more, I noticed some movement on another leaf. There were a few creatures that looked like ladybug nymphs, but they were curiously different from those on my brinjal plant. The shape was the same as the other nymphs I had seen, but these were a golden-yellow colour, with black spots and stripes on each segment. They also looked somewhat translucent and squishable, if you’re into squashing juicy bugs.

At that point, my brain put the yellow ladybugs and yellow nymphs together and came to the conclusion that this was a different variety of ladybug – yellow ladybugs! In fact, I’ve also seen dark brown or black beetles shaped like ladybugs – so it stood to reason they could all be cousins, right? Whether red-spotted-with-black, black or yellow, they’re all the same general size and shape, and probably from the Coccinellidae family of beetles.

The yellow ladybug in pupa stage - for some reason, the cocoon reminds me of the Power Rangers...

Now, the black nymphs on the eggplant plant were feeding on yellow aphids, but there was no such infestation on the angled loofah plant, yet the nymphs were running around excitedly and pausing periodically, looking like they were feeding on something on the surface of the leaves. There didn’t appear to be any other creatures that I could see, but what there was a lot of was powdery mildew (no thanks to the wet weather). From my online research, I’ve learned that besides soft-bodied insects like aphids, some ladybugs also eat pollen, fungus and plants. So, maybe this is why the yellow beetles were on the angled loofah plants and nowhere else that I can see – maybe they like the leaves or the combination of mildew and leaves. I’ve been checking the other plants with mildewed leaves but don’t see any yellow bugs, so this is likely a plant-specific attraction.

The final confirmation of these beetles’ ladybughood was when they started going into pupa stage. Once again, I saw the same type of “prawn-like” cocoon formed, with the “tail” stuck on to the leaf surface and the fat end looking like some sort of armour. This cocoon, like the nymphs, was yellow with black patterns and had some translucent edging here and there. It reminded me so much of the Power Rangers or Transformers!

Side view of the yellow ladybug - they all seem to have the same two pairs of black dots on the white part of their bodies.

These yellow ladybugs really seem to like the angled loofah plant, because there are currently quite a number of nymphs at various stages of development, as well as cocoons that are occupied or already discarded. If I weren’t such a fan of them, I’d probably be itching to kill them off because there are so many of them. More than two of the same bug are too many, in my opinion!

The good thing is, they don’t seem to be causing harm to the plant. On top of that, if these creatures are really feeding on the mildew on the plant leaves, then I am even more glad to have them around – and less resentful towards the white-gray covering on the plant leaves. This just shows once again how things in nature that we consider nuisances become boons when combined with something else – or just how nature balances itself out. 8)

© 2011 curiousgardener.com All rights reserved.


Share

Grow, mangosteen tree, grow…

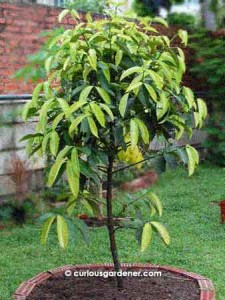
The mangosteen tree a year ago - slow and scrawny.

Two years ago, we sadly said goodbye to our old apple mango tree that had been infested by wood-boring beetles. My dad, the fruit-grower of the family, declared that he wanted to grow something less troublesome, and chose to replace the apple mango tree with mangosteen trees. According to him, very few pests bother these plants.

And so we bought three grafted plants to fill up the area covered previously by the mango tree. I know three sounds like a lot, but besides providing fruits, trees in our garden are usually kept to provide shade and privacy. Losing the nice big apple mango tree so suddenly gave a clear view into our garden, and the immediate exposure was odd.

The trees were planted in a row at the distance advised by our friend at the plant nursery – about 2 to 3 metres apart, because they’re grafted trees and won’t spread out much (he said). Not being a fruit-growing aficionado, I just followed the advice when planting them. They were less than 1.5 metres tall when we got them.

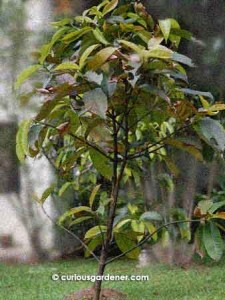
The mangosteen tree a year later, after the compost and bonemeal treatments - obviously growth has been stimulated.

Unfortunately for the trees, my dad was unable to do much garden work after that, and they were left in my “care”. That meant they were fed whatever fertilizers that my other plants got – some bonemeal, chicken poop, sheep poop and phostrogen – when I remembered to administer them, and green mulch when the lawn was mowed. The plants didn’t die, but neither did they grow drastically.

When I reflected on their growth earlier this year, I realized they were likely doing what our bauhinia plant did – they probably used all that time to establish their root systems in the new environment and didn’t have much energy left over to branch out and grow above ground. Determinedly, I began administering stronger doses of fertilizer, and buried dead fish from our aquarium at the base of the trees in the hopes that the nutrients would spark their growth, as happened with our bauhinia plant. When I got my ton of compost, I added a layer of that as mulch from the stem of the tree out to the edge of the tree line. That seemed to perk up the trees a little, and they began to produce more leaves and new stems for a while.

How the mangosteen tree grows new leaves.

Visiting the plant nursery a few weeks ago, I asked our friend whether the trees were growing too slowly, and was told that they were. I was advised to loosen the earth and add bonemeal to fertilize them. So, I got a thin metal rod and poked it as deeply as possible around each of the mangosteen trees. I figured the thin rod wouldn’t damage the tree roots as much as a spade or changkul would. After doing that, I sprinkled bonemeal over the loosened mulch (the compost hasn’t decomposed completely yet), then did more poking to help the bonemeal penetrate deeper into the soil. After that, I watered the plants and sat back to watch.

After about 2 weeks, the trees started growing more rapidly. I was fascinated to see how the tip of each stem split to push out a new pair of leaves. It’s gratifying to see the trees full of shiny, new light green leaves, and with longer branches than ever. My next goal is for them to start flowering, because that would make my dad so happy. Both he and my mum have fond memories of eating these fruits fresh from the trees when they were children, and I’d love to be able to bring back that piece of the past for them. So, grow mangosteen trees, grow…

© 2011 curiousgardener.com All rights reserved.

$1.99 Domains* at GoDaddy.com

Share

Bean snatchers

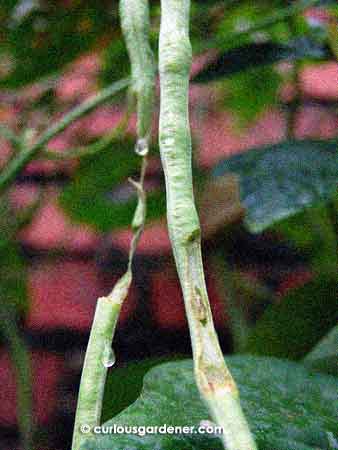
What would do this to long beans still growing on the vine?

It’s been raining a lot lately and I suppose food is hard to come by for the creatures in the garden. I’ve been tolerant with the caterpillars munching on some of my more leafy plants because I told myself they’re doing me the favour of thinning the leaves and allowing more airflow through the plants as powdery mildew has been appearing in lots of places. Where I draw the line, however, is when my veggies get eaten. Something has been helping itself to my thin long beans, and I am not pleased.

The beans have been broken off and look like they’ve been stripped sideways. Could the green parakeets that eat the broad beans from the Peacock trees have discovered these beans? I saw one watching me from the roof when I harvested some beans a few days ago. Could there be another squirrel around that I haven’t spotted yet? Or could it be those voracious garden snails getting too adventurous? Just today I found one adult snail resting at the top of the angled loofah trellis – about 2 metres up. I shall have to get my Sherlock gear out and try to solve this mystery soon because these daily attacks have reduced our bean harvest a lot! :(

© 2011 curiousgardener.com All rights reserved.


Share

The first Kiwano flower

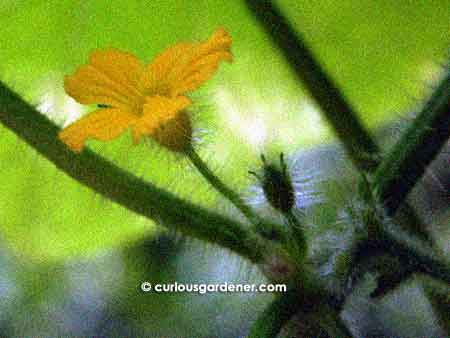
It's a boy! The first Kiwano flower in bloom.

A few months ago, a friend gave me a packet of seeds for something I had never heard of before – the Kiwano, or horned melon. Neither of us knew if it would grow here, or what it tasted like, but thought it would be fun to try growing anyway. I am not called the Curious Gardener for nothing…

So I sowed some seeds in August and was rewarded with just one seedling. I placed it in a temporary home at the back patio while I attended to other things. Well, the Kiwano plant simply made itself at home and grew, so I stuck in a short bamboo stick as a climbing support. It reached the top in quick order, then found a pathway upwards, over and on other plants before I realized how rapidly it was growing and quickly set up a trellis and transplanted it in late September. By that time, it was almost long enough to reach the top of a 2-metre high trellis!

The young Kiwano plant with the first tendril - this is before the prolonged growth spurt.

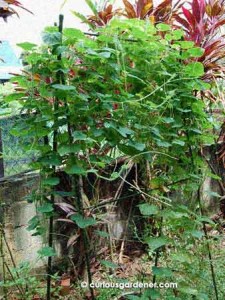
The state of the vine today - boy, has it grown and spread!

I also mentioned in an earlier post that this plant is not named the horned melon for nothing. I said this because the stems and leaves – heck, the flowers, too! (just look closely at the pictures) – are covered in short, stiff bristles that leave a stinging sensation for quite a while, if you’re unfortunate enough to brush against or get pricked by them. I quickly learned to hold the plant by the tendrils when training them onto the trellis – but even those grow bristles when they’re old or long enough! Of course, the melon gets its name because of the horn-like protrusions on its skin, but to me, for now, “horned” refers to the evil way it poked and scratched me…

The Kiwano flower is as small as your fingertip!

The Kiwano plant spent more than a month constantly branching out and spreading before I was finally rewarded today with the sight of the first flower. I’ve been worse than an expectant mother hen, checking it daily for about a month now. Each time a new protrusion appeared along the stems, I would hold my breath in anticipation of flower buds, only to realize later that it was a new stem growing out.

This looks to be a male flower – a pale yellow cucurbit-like flower on a thin long stem – very much akin to bittergourd or cucumber flowers, but smaller. If it follows the pattern of cucurbit plants, it will produce a number of male flowers for a while before it’s ready to let the ladies out to play, too. Let’s see how long that takes to happen, because I’m really intrigued to see this interesting fruit!

© 2011 curiousgardener.com All rights reserved.

Share