Awaken, sleeping beauties…

Certain foliage plants tend to catch my eye – usually caladiums and alocasias with interesting shapes, colours and patterns. Goodness knows I’ve bought and collected several of them without knowing their identities. I still don’t know the names of all of them, but I like them very much.

One thing I’ve learned about these plants is that, like my culinary ginger plants, they go into hibernation for several weeks before regenerating themselves. If not for that bit of knowledge, I could have considered the plants as goners and tossed the soil or planted something else in the pot, as I’ve done in the past. However, with that little sliver of hope, I kept watering the soil lightly on hot, dry days – thinking what a fool I was to hope – but was finally rewarded when new growing spikes appeared. Here’s the tale of two plants…

The Red Caladium

The gorgeous patterns on the Ma Had Thai caladium leaf. You can't get more Christmassy than that!

I didn’t know the identity of this plant when I first got it, but since it grows from a corm, I assumed it’s from the caladium family. I picked it up last Christmas because the deep red leaves and dark stems added to the yuletide feeling. I re-potted it when I first got it, then watched in alarm as, one by one, the leaves died off until, like the Highlander, there was only one. It, too, died, and I kicked myself for traumatizing the plant. However, it began to grow again, but the leaves were different – probably because of the new potting mix and maybe the shape of the pot, which was shallower and wider than the original. These new leaves were rounder, broader and a bit more vibrant in colour, and the leaf stalks were shorter. I was so pleased! But after a few months, it died off, and I kept my fingers crossed it would “wake up” again – which it has! After some online searching, I’ve finally gleaned its identity – the Caladium Ma Had Thai, or ‘Hot Lips’. I think I’ll stick to calling it Ma Had Thai.

The Speckled Alocasia

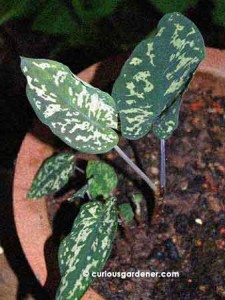
The regenerated Hilo Beauty plant with soooo many new leaves. We are pleased!

The next plant was also an impulse buy. I liked the camouflage green pattern of the leaves. I’ve seen this identified online as an Alocasia ‘Hilo Beauty’. It’s an extremely slow grower, and has put out a maximum of just 3 leaves at a time. So when it began to die out, we looked on in dismay, because mum and I really liked it. We had experimented with a couple of different soil mixes, fertilizers and locations, but couldn’t get it to do any better. This was actually our second pot of this plant. However, I once again kept my hopes up and kept the soil reasonably moist, and was thrilled to see it start growing again after about 2 months. What made me extra happy was that there were three growing spikes instead of one! Alocasias grow from rhizomes, so I guess (short of digging up the plant to see) that the rhizome must have been growing bigger, which is why it has now sprouted more heads – that have now sprouted more leaves each. 8)

I just think it’s so interesting that plants have a time for growing and a time for resting, and I’m so grateful that these babies didn’t die out. It gives me more confidence to go and acquire some of the other plants that didn’t survive in the past!

© 2011 curiousgardener.com All rights reserved.


Share

Bittergourd seed viability

Last year, when my first bittergourd vine started dying off, I got worried that I had not saved seeds for a new vine, because I didn’t know that the fruit would be a hit on the dining table. I was lucky to be able to scavenge some seeds from the ground below the vine, but they were probably not of the best quality. Well, beggars can’t be choosers, right? I grew one vine from that lot of seeds and kept a couple of seeds as backup.

My luck held in the following months when a bird deposited a new seed that grew into a healthy plant, and I managed to save good seeds from an over-ripe fruit from that new plant. However, I wondered about the seeds that I’d saved from last year. So, since I’ve been in a seed-sowing frenzy lately, I added them to the mix. It would be interesting to see if 9-month old seeds would still be viable.

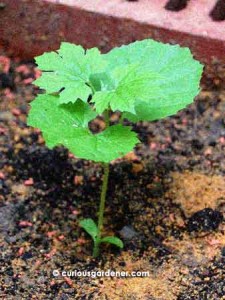
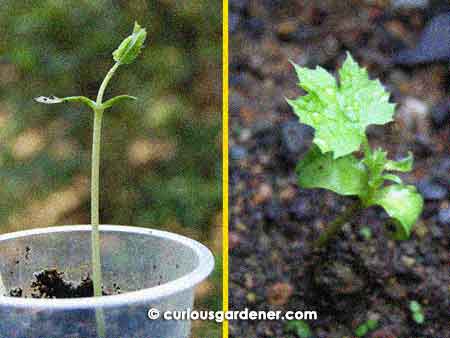
The new sprout from the old seed on the left, compared to a previous sprout from a fresh seed.

They were, but the plants that sprouted didn’t look as healthy as those from fresher seeds. The main thing I noticed was that the seed leaves were smaller and thinner than those from a fresh seed.

The good thing is, even though the sprouts didn’t look so robust, they did continue to grow as normal plants as they got older.

The next generation of bittergourd, grown from 9-month old seeds.

I guess fresh seeds will give you stronger seedlings, but when all’s said and done, the plants will grow as best they can!

© 2011 curiousgardener.com All rights reserved.


Share

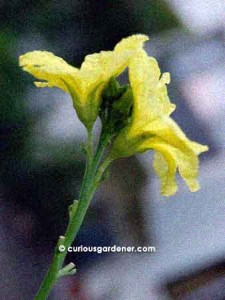
Growing kangkong in water

By name, kangkong is a water-loving plant – water spinach or Water Convolvulus. Yet, I’ve been growing it in soil with reasonable results. Well, the only thing is, they need to be heavily watered every day, or else the plants start wilting fast.

The roots that grew on the long kangkong stem.

It also doesn’t help that I chose to plant them in hanging recycled PET bottles. This means that they dry out faster and they’ve become root bound as well. (Note to self: next time I won’t put in drainage holes in the hanging bottles so they don’t lose water so fast – yes, next time!)

Anyway, I had one plant that had grown a very long stem. I was reluctant to cut it because it bore a lot of flowers, and they were just too pretty to not let bloom. The stem has since cut back on growth – probably because I don’t water the plant as much as it needs – and the stem became bare of leaves while roots tried to grow at the leaf nodes as the plant fought to propagate itself before it died completely.

This is one of the amazing things I love about plants – seeing the ways they strive to survive and reproduce themselves.

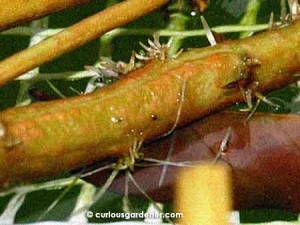
The network of roots that grew after 2 days in the water.

Finally faced with the ugly, long bare stem, I decided to cut it off. However, seeing the roots at the leaf nodes gave me an idea…

We have an outdoor fish tank that is covered with some plastic netting to keep the fish from jumping out and prevent birds from stealing the fish. Part of that netting began to droop, and when the water level is high, it is partly submerged. I decided to see if the water spinach would show me just how much it liked growing in water, and cut the very long stem into several pieces, placing them on top of the netting so that some of the root nodes were touching the water, and one test specimen directly on the water, under the netting, because I’d heard that the hollow stems help them to float. They do!

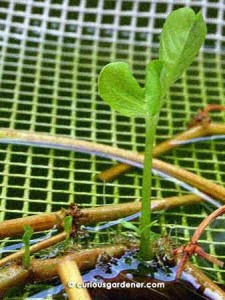
Little green shoots of water spinach by Day 4. Also notice how the roots are also sprouting like crazy along the stems.

Within 2 days, the stems on the netting started growing lots of new, white roots that reached eagerly towards the water. Just as eagerly, the fish were below the netting, trying to nibble at them! However, the stems were protected, and soon some green shoots started popping up.

The floating stem drifted around and also started growing new roots, but not as fast as the others – perhaps because it didn’t receive as much direct sunlight, being under the netting. So far, though, it doesn’t seem to be eaten up by the the fish as I thought it would be.

It will be interesting to see how the plants fare as time goes on. Will they get enough nutrients from the water as their potted counterparts? For obvious reasons, I can’t add fertilizer to the fish tank, so I hope the fish help out in this area, if you know what I mean… Let’s see how this spur of the moment experiment concludes!

© 2011 curiousgardener.com All rights reserved.

Share

Growing the angled loofah …again

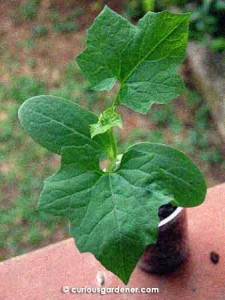
Young angled loofah plant - it grew at quite a voracious pace.

When I humbly began growing edible plants early last year, my philosophy was to stick the seeds in soil and let them grow. How that has changed! These days, I germinate the seeds and let them grow a little before putting them at the mercy of the creatures and climate out in the garden.

In my first round of growing angled loofahs, I literally planted the seeds next to the fence that I wanted the plants to vine through, and that was it. There were a couple of casualties and I ended up with a single long vine that produced 3 good-sized loofahs. We ate one, but it was harvested too late and was very fibrous. Unfortunately, the other 2 were hidden from sight, and by the time I saw them, they were too old to be harvested for eating. I still have them though – they’ve dried out, skin and all, and make an interesting pair of maracas… :D

This time, I promised myself I’d do a better job of growing loofahs. I germinated the seeds and let them grow in the safety of the back patio until they were nice and strong.

Male loofah flowers bloom either singly or in a pair. Notice more buds in the middle that have yet to bloom?

Actually, I put off transplanting them because I needed to make a trellis for them first, so one of them grew about a metre high before it was placed in its new, permanent home – my A-frame trellis. The other plant grew more slowly and was only about 40cm high when it was transplanted.

Before planting the two vines at the trellis, I amended the soil with some GreenBack compost and sprinkled in about a tablespoon of bonemeal. Then the plants went in and I backfilled with the amended soil.

The bigger vine absolutely loved the trellis and grew to the top of the 1.7m high trellis in record time. To cap things off nicely, a female flower bud grew right at the top of the trellis. I hand-pollinated it at night, since the flowers bloom in the evening, and began watching the bud like a hawk for the next few days. I fancied that the little fruit was expanding, and by the third day after the flower bloomed, it was clear that pollination had been successful and the fruit was growing.

The female loofah flower grows upright, then bends to a horizontal position after blooming.

And grow it did. It actually grew a whole centimetre over 24 hours, and just kept growing incredibly fast. I realize that that last statement can be interpreted in many ways but it’s strictly in context of the loofah growing on the vine, okay? :P I hoped that it would grow as big as last year’s fruit did – almost half a metre long – but it didn’t. Well, it might have, if I’d left it on the vine longer, but we wanted to eat this one. Since I read that the best time to harvest it for eating was 12 to 15 days, we waited for the 2-week mark, then happily removed it from the vine. It was a mere 25cm long (only about half the size of last year’s crop), but tasted as sweet as all our home-grown veggies do. The only problem was that it had already begun to harden. Next time, I’ll pluck it when it’s a bit younger.

Finally, the angled loofah fruit at 2 weeks old.

The smaller vine has been budding with male flowers for a week, and finally, the female buds have made their appearance. Unfortunately I missed the blooming of the first female flower, and it doesn’t appear to have been pollinated. Fortunately, there are a few more buds further up the vine, so I will have to be more observant so I can hand-pollinate the next flower.

The first vine has yet to produce another female flower. It was attacked by the same kind of caterpillar that went for my caixin plants – they target clusters of flower buds and leave sticky webs behind. These, however, are bigger caterpillars, but they also had a great time eating the buds before I caught on to them. I suppose the plant will have to recuperate for a while. Maybe it’s time to sow another couple of seeds to ensure a continuous supply of ketola…

© 2011 curiousgardener.com All rights reserved.
$1.99 Domains* at GoDaddy.com

Share