We have winged beans!

I knew it! My winged bean plants needed some criticism to get them to start fruiting. Or perhaps they just wanted to be the first veggie babies of September, after being excluded from the list of August veg babies…

The great news is, the winged beans are finally forming!

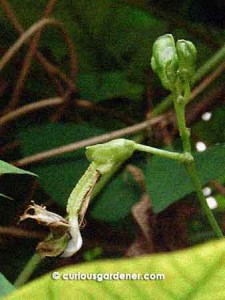
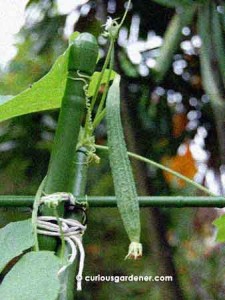
Almost 2 metres up, this was probably the first four-angled bean to grow.

This was the first bean I saw, originally with the flower petals still attached to the bottom half. Yes, I pulled the petals off... :)

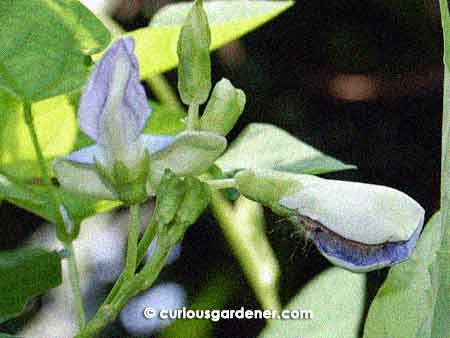
And this is a picture of the winged bean flowers, and a possible reason why the beans have taken so long to form - look closely at the flower on the right and tell me what you see...

So let’s just backtrack and see how long the kacang botol vine took to mature:

  • Planted in late February
  • Started flowering in early June (just over 3 months old)
  • Set fruit in September (just about 6 months old)

Is that normal? I know that other people also wait a long time for the four-angled beans to start appearing, too. The good thing is, I’ve heard that these plants fruit prolifically, so perhaps that makes the wait worth it.

I’m so thrilled the beans are finally growing! I was consoling myself with the idea of seeing what the plant tubers will look like if it came to the point where I would cut down the useless vines. Now I can have both! :)

© 2011 curiousgardener.com All rights reserved.


Share

My comfrey’s journey

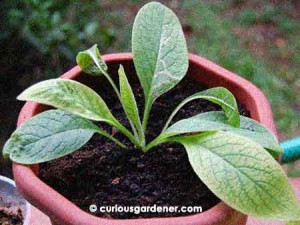
The comfrey when I first got it - in a 7cm pot.

When I read about how comfrey can be used in gardening, I wanted to get it. The only problem was, it’s not native to Singapore – so I gave up that idea until my “plant fairy godmother” who likes to grow the cute and unusual gifted me with a young comfrey plant. :D

I have this weird idea that plants grown from seed in the environment they’re going to grow in will be more hardy than an already growing plant. What if my micro-climate is so different from what it’s used to that it won’t survive?

Godma Sky recommended I place the newly potted comfrey plant in a closed plastic bag so that it would be in constant humidity. As the weather at that time was hot and dry, I did that, and left the plant in its terrarium for quite some time (which was quite cool, because I didn’t have to bother about watering it!). It grew new leaves but began to lighten in colour as I didn’t want to give it too much sun.

The comfrey in its new home - a 15cm pot this time.

Yes, I was really nervous about keeping it alive! :D

However, the plant kept growing, and when the weather became more rainy, I decided to risk taking it out of the protective “bubble” and let it acclimatize to its new home – finally. When the rainy weather broke, I worried again that the plant would dry out, so I fitted the pot into the top of a plastic cup that I filled with water, creating a self-watering pot! It survived, but the roots eventually grew out and into the water reservoir below. So, I’ve transplanted it one more time to a bigger, deeper pot. It’s also in a new location with morning and afternoon sunlight as I think it needs to photosynthesize more. Leaf miners have also “visited”, hence the squiggly white lines on the leaves. :(

So, Godma Sky, the comfrey is still alive. I hope it will grow as well as your plant!

© 2011 curiousgardener.com All rights reserved.


Share

August veggie babies

I am such an expectant parent when my plants start budding. In the case of fruiting plants, I tend to watch the flowers like a hawk, hoping that pollination will be successful and that I’ll see tiny fruits developing before my eyes. Unfortunately, watching the plants so closely seems to make them shy, and often, nature takes its course when I’m elsewhere.

Our first brinjal fruit developing!

Such was the case with my aubergine plants. Not knowing which conditions would suit them, I dispersed plants in several locations in the garden. So far, I’ve found caterpillars, grasshoppers, whiteflies, mealy bugs and a ladybug on them. And each time they bloomed, the flowers would abort. So, one fine day, I went to check the plants, and noticed that the stalk and receptacle (base of the stem) of one flower looked different. They had thickened and looked shiny, and the flower petals had dropped off. The sepals (green leafy things on the edge of the receptacle) had lengthened and closed, almost shyly. I crossed my fingers and watched this for a couple of days before, finally, the rounded bottom of a growing fruit started protruding from behind the closed sepals. Ladies and gentlemen, our first eggplant fruit is growing!

The first angled loofah - 3 days old and 9cm long!

Our next story is of the angled loofah. This plant was nurtured for about 4 weeks before being planted out at a trellis. It was already about a metre high at the time. Conditions were optimal for it and within a week, it had produced bunches of male flower buds. These buds open one or two at a time, so the bunch lasts for several days. Almost 2 weeks after being planted out, the first female flower matured. Angled loofah flowers bloom in the evening and stay open till sometime in the night. I’d like to say I took a moonlit stroll to see them, but there was no moon out that night. No, it was by torchlight that I plucked one of the pair of male flowers blooming then, removed the petals, and hand-pollinated the female flower. It’s possible that I need not have done anything, because there was an ant investigating the female flower – but who knows whether it had visited a male flower beforehand? Whatever the case, the female flower has kept growing – rather, the petals fell off, but the fruit has been getting a little bigger – so I believe I can announce our first ketola of 2011!

Young okra growing!

We’ve had okra plants growing for some time, but since we’re talking about veggie babies, I’m giving them some of the spotlight, too. Ladies Fingers (as okra are also called) are a favourite on our dining table. Freshly harvested fruits are tender and sweet, and I’m making an effort to do successive planting so that we have a continuous supply of this vegetable. I also recently acquired seeds for a burgundy version of the okra, and am intensely curious to see the grown fruits. In the meantime, though, the regular green okra will continue to make us happy.

Perhaps, one of these days, the winged bean plant will finally set fruit and I will have the satisfaction of sharing the news with you…

© 2011 curiousgardener.com All rights reserved.


Share

Making an A-frame trellis the DIY way

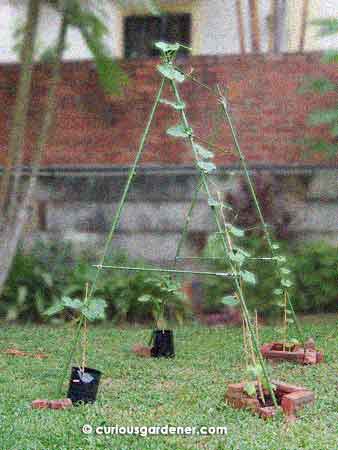
My latest A-frame trellis with angled loofah vine growing on it.

I’ve experimented with a few versions of the classic A-frame trellis, usually with thin bamboo sticks that work for small, light plants. Okay, so maybe I don’t grow that many small, light plants – which is why the trellises usually fell over sideways or into themselves, and needed a lot of hastily-added supports as the plants grew.

On a recent visit to one of my favourite plant nurseries, I was thrilled to see thin metal poles encased in plastic on sale – and they were of various lengths and thicknesses. I usually like to use recycled materials to make my trellises, but I’ve been unable to find poles that would last in the garden. Insects happily set up home in the hollow bamboo poles, and I don’t like that. Nope, these new poles were perfect – strong and insulated. To the amused curiosity of the people at the nursery, I bought an armful of these poles and went home one happy gardener.

I like to keep my DIY projects as simple as possible, and so constructed my A-frame trellis of:

  • 4 strong, tall poles for the sides
  • 2 short sticks for the sides
  • 3 long, thin poles for the horizontal supports
  • at least 10 cable ties
  • string/twine

The top of the trellis, with the horizontal pole extended

The first step was to decide where the first end of the trellis would be. This is where 2 tall poles would be anchored in the ground to form an inverted ‘V’. I loosened the earth then pushed the sticks in at an angle so they joined at the tops. You need to let them cross a little, like an ‘X’, so you can later sit the horizontal pole in the ‘V’ at the top. I used a cable tie to secure the tops of the poles, then wedged stones at the base, tamping them into the soil to give more support. Finally, I tightly tied string over the cable-tied joint to hold the poles together. There’s probably a technique to tying such joints, but until I learn it, I simply wrap the string every possible way to bind the poles as tightly as possible. I’ve learned the hard way that the trellis will collapse more easily when the joints aren’t tight, because they can move and loosen, and then begin to succumb to gravity. :|

The next thing to do was attach the horizontal short stick that would create the ‘A’ shape. I positioned it so that it didn’t stick out too much on the outside. This allowed me to place it as low as possible, which would add to the strength of the frame. Again, I used cable ties on each end to hold the stick in position before I tied the poles securely.
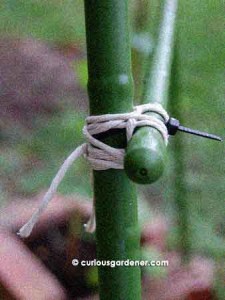
The horizontal joint on the side of the trellis. See the cable tie sticking out on the right? Leaving it on will help in case your knots give way...

You’ll notice that my tying of this joint is more deliberate. A few months ago, I found a book from my childhood, Huts And Tree Houses, that among many things, demonstrated how to tie perpendicular sticks together. For fun, I tried to create a tic-tac-toe style trellis, which had involved using this tying technique several times – which is why I remembered to use it here.

With the first ‘A’ complete, I placed one of the thin poles on the ground to gauge the distance for the other end of the trellis. I didn’t want to risk not placing the sides close enough, so I gave allowance for the top stick to overlap the two ends.

I repeated what I did to construct the first ‘A’, then it was time to lay the last pole across the top and tie it in place with more string. The last two thin poles were attached part of the way up to provide horizontal growing surfaces. I was lazy and simply used a cable tie, pulled tight, on each end to secure them, reasoning that they aren’t major joints and it’s alright if they slip out of position…

And just like that, in less than 30 minutes, my 1.7-metre high trellis was complete.

If you need to amend the soil where you’re putting in your plants, do it beforehand. My plants – in this case, a pair of young angled loofah plants – were already growing up short support stakes. I positioned them so that the supports would lead the plants to the trellis. They settled into the new home and their tendrils latched onto the trellis within 2 days. Now it’s time to see how this trellis design suits the angled loofah.

© 2011 curiousgardener.com All rights reserved.

Full-Featured Hosting for Your WordPress Blog - GoDaddy.com

Share