The big grasshopper

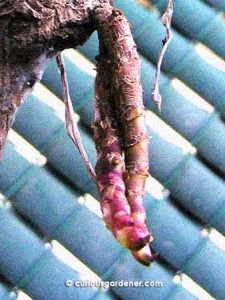
A few months ago, my mum, the Keng Hwa queen (so nicknamed because the Keng Hwa plants are her “babies”) noticed a new visitor on one of the Keng Hwa plants.

The insect on the Keng Hwa plant.

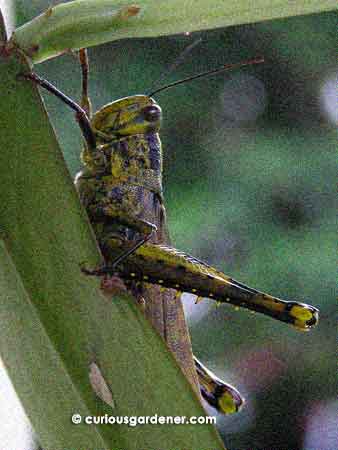
I thought it was a locust because it was pretty big at about 8cm from head to other end, but online searching did not confirm that, so I’ll resort to calling it a locust until advised otherwise – although they’re both from the grasshopper family.

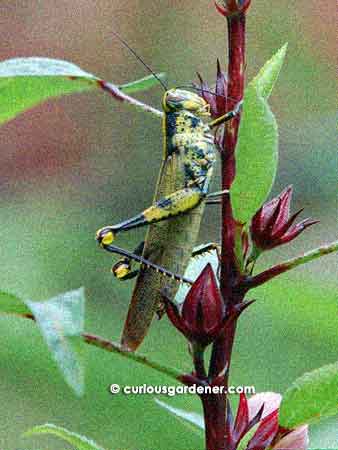
Whatever insect it really is, it made a re-appearance today, at my roselle plants.

The insect seemed to nibble at the plant stem and leaves, but nothing looked eaten when it left.

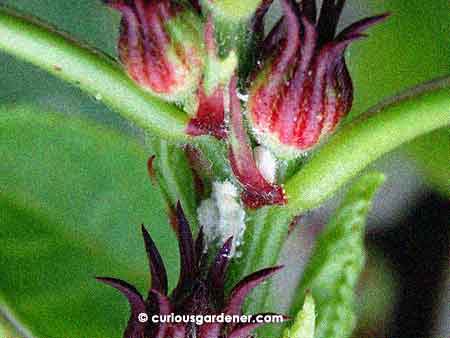
It seemingly nibbled along the stem and some of the young leaves. However, when it left, the stems didn’t look eaten. Could it have been eating little mealy bugs that I couldn’t see? Because those darned bugs were setting up home on the roselle plants, which was why I was there – removing the larger (yuk!) squishy bugs by hand.

Blasted white mealy bugs on my pretty roselle plant!

Well, it’s wishful thinking on my part, and maybe the locust was indeed feeding on my plant instead of the bugs, but it didn’t like being stalked by a photographer. In a blink of the eye, it shot out of sight with a buzz, like some kind of superhero. Seeing it once was a coincidence. Seeing it a second time says we’ll probably see it again. Maybe by then, I’ll know what to call it.

Addendum to this post, 17 Sept 2011: Thanks to my visitor Pat, I now know that this insect is indeed a grasshopper – an adult female Obscure Birdwing Grasshopper (Schistocerca obscura), to be exact. Scroll on down to the comments for more information. Thanks, Pat! :)

© 2011 curiousgardener.com All rights reserved.


Share

Propagating Cordylines

My blazing beauty of a cordyline, just after flowering. Isn't it a majestic sight!

Here’s the thing. When I first got interested in gardening, I wanted to beautify the garden. To me, this meant having bright, colourful flowering plants. And so we ended up with Peacock trees, different types of periwinkles, bauhinia, allamanda, and many other flowers that I didn’t know the names of, but had to have them because they were pretty. It’s lame, but that’s how I started.

I also had a sort-of agreement with my Dad – he’d look after the fruiting plants and I could manage the “fluffy” stuff. But then he saw how cordylines had been used in landscaping and decided we needed them in our garden.

We started off by buying three little clumps. They were less than a metre tall when we got them. The leaves were a very deep maroon, almost black, and I wasn’t impressed. They weren’t anywhere as pretty as all my colourful plants. However, as the plants matured, the leaves changed colour to maroon, then deep red. I changed my mind then. :)

I thought these were roots, but they were leaves sprouting from the bottom instead!

Time passed and the plants grew. Each clump grew taller and bushier, and we had to prune them. Now, it’s my pet peeve to not throw a healthy plant away, so my automatic reaction to any cutting is to try to grow it. I figured we could make a hedge of cordylines if I succeeded. To my surprise, I did! At the time, that was the biggest plant I’d tried to grow by cuttings — the stems were about 4 feet long, and I simply pushed the end into the ground as deep as I could, to keep it upright and give it a good chance to root. Naturally, my success egged me on, and we eventually had cordylines lining the front and side fences.

Fast forward a few years during which we didn’t have much time for gardening and the plants pretty much fended for themselves. They grew bigger and bushier, eventually looking a little forlorn that they weren’t getting as much TLC and fertilizer as before. Some branches had grown too long and had become top-heavy, causing the branches to dip downwards. The leaves, however, continued to try to grow upright, so we got some pretty interesting shaped bushes (before we finally got around to pruning them).
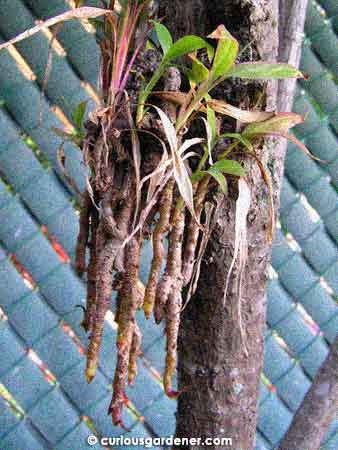
Self-propagation at work - little "cordylets" sprouting along the main stem of a matured plant

I also noticed that some of the longer branches had developed what I thought were aerial roots with maroon-green tips. Ever the curious gardener, I broke off a couple of the “roots” and stuck them in a flowerpot. Guess what? New plants grew! Had I left them on the parent plant long enough, I would have learned that the bottom tip would eventually hook upwards and develop into the leaves of a new plant.
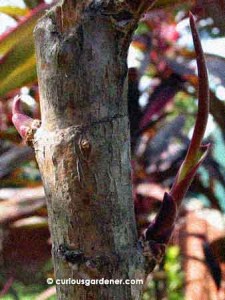
New sprouts growing after pruning.

These root-like growths appear along the main stems where, in my humble experience, the plant can be pruned and replanted. They develop into “cordylets” (as I’ve nicknamed them), sprouting leaves at their tops in addition to the sprouting bottoms. I’ve found that these can be pulled easily from the main stem and planted successfully. The plants are so ingenious that you can even lay the detached stem horizontally and it’ll sprout not only at either end, but also along the stem. They’re incredibly hardy.

Oh yes, and when you prune the plant, the parent plant dutifully grows up to three shoots to make up for the missing “head”, so you get an even bushier plant thereafter. Absolutely fascinating — to this curious gardener, anyway!

Cordylines love the sun. The leaves of our red variety change colour to a maroony-red in full sunlight. Once in a while, you’ll be rewarded with long arrays of small, pale pink flowers. Reminds me of those decorations they have at Malay weddings. The leaves of the young plants are light green, but as the plants mature, they will turn almost black before putting out pink, red or maroon leaves.
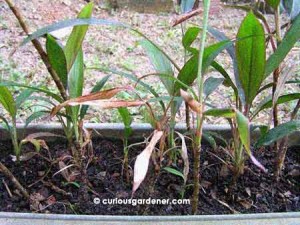
My cordyline "nursery" made from aerial plantlets plucked from the parent plants.

Visit the International Cordyline Society if you want to learn more about these beautiful plants. I found out there there are way more varieties of this plant than I’d ever imagined! Hope you find it as interesting.

© 2011 curiousgardener.com All rights reserved.

$1.99 Domains* at GoDaddy.com

Share

More on growing culinary ginger

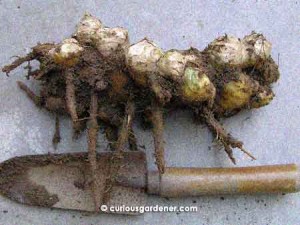
Ginger rhizome harvested in January this year - 11 months old.

Last year, I started growing zingiber officinale or culinary ginger from bits of ginger bought from the supermarket. I had a few good clumps of them, and a few plants that also died off, no thanks to my trampling dogs. Each plant consisted of an interesting row of ginger rhizomes.

Let me explain.

The first shoot grew out of a lump of ginger. Below ground, the rhizome grew as the stem did. Then, the rhizome started growing a new stem that grew out of a new segment. From there, it kept adding new stems in a straight row, creating a very orderly looking ginger rhizome that I found so cute!

Part of the rhizome that shriveled up :(

Then, towards the end of the year – about 10 months of growth or so – the leaves died out. I dug up one clump to see what it looked like. The ginger seemed rather small, or young, compared to what we buy, so I left the rest in the ground to let them mature more. I was hoping that they would grow into those big, fat rhizomes that are sold in the market. However, after the leaves died off, the plants seemed to hibernate for a long time.

Unfortunately, a couple of clumps rotted away – probably due to the excessively rainy weather we had earlier this year. I was disappointed when I noticed what was happening, and even more so when I dug up the affected clumps to find them shriveled up and hollow – albeit with a strong ginger smell.

The row of new ginger sprouts from the old rhizome that was hibernating for a few months. They're the vertical sprouts growing beneath the leaves of my jicama plant.

A few more clumps remained dormant, and when I got my load of compost a few months ago, I added a layer of mulch to the planting bed where the ginger is. I wondered if the mulch would help or harm the sleeping ginger. Well, I finally have my answer, and I’m happy to report that the ginger is “awake” again, and several shoots have emerged and are growing now. Since they are in a row, I guess they’re from the same rhizome. :D It will be interesting to see, in coming months, what direction the rhizome will be growing – because it can’t still be in a row if the old rhizome has started growing.

The new growth from the ginger that was planted in a flower pot last year.

Last year, I also planted one sprouting bit into a pot, to see how the growth would compare to the plants in the ground. Well, it grew more slowly and not that big, before it, too, went dormant for several months. However, it is also now up from its slumber and is growing again, better than last year. So this shows that even apartment dwellers can grow zingiber officinale, especially as it is not such a sun-hungry plant.

I guess the next stage is to see how the remaining clumps of ginger grow this year. I know that we can break off part of the growing clumps to use if we want to – and we may – but I will leave at least one plant untouched to see what it does. Stay tuned in the coming months for more…

© 2011 curiousgardener.com All rights reserved.


Share

New plants, new seeds, new anticipation

If you know me by now, you’ll know how getting new “babies” for the garden makes my day. Several new passalong plants have found their way to me:

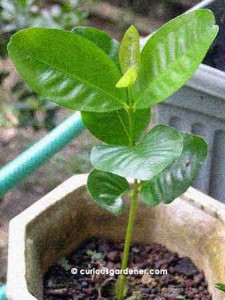
Young red jambu plant

A red jambu seedling that a family friend couldn’t resist trying to sprout upon finding the unusually large seed in the fruit she was eating. Since the fruit was sweet, she thought it would be interesting to try planting the seed. And since I’m now known for growing plants, I “inherited” the seedling!

And I’ve also got several young plants from Sky:

Plains coreopsis - hope they'll flower for me!

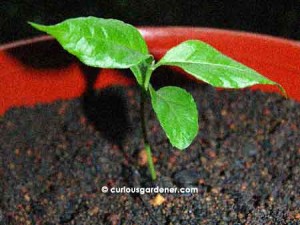
Seedling of the intriguingly-named peanut butter plant.

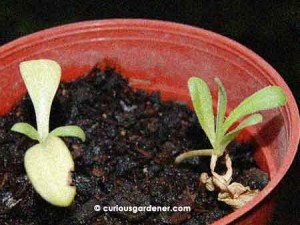
Calendula officinalis seedlings - a different variety of marigold from what I've got.

Thank you, Sky, for the above passalongs! 8)

There have also been several new additions to the “seed bank”. A good friend knows I like growing edibles and has passed me several types of seeds so we can find out if the plants can grow here. Of course, my challenge is that I know know nothing about these plants, but will give it a try, with the initial planting being the “acquaintance” round. It may go well, and it may not; hopefully when it’s over, I’ll understand the plants enough to be able to have a successful harvest at least at the next planting, if they like growing here.

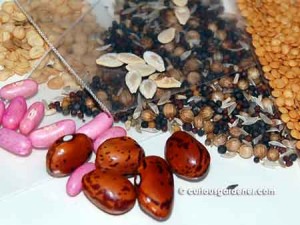
Looks like a pharmacy but it's just my new seeds to experiment with: (from top left) sweet pepper, Kiwano, mixed salad, aubergine, and two varieties of beans.

These are the seeds in question:

  • Fagiolo Borlotto Nano Lingua Di Fuoco (Phaseolus vulgaris) – red & white podded beans
  • Fagiolo Nano Solido (Phaseolus vulgaris) – normal beans
  • Melanzana Violetta Di Firenze (Solanum melongena) – aubergine
  • Peperone Friarello (Capsicum annuum) – sweet pepper (I think!)
  • Kiwano / Horned Melon (Momordica charantia)
  • Salad mix (Lactuca sativa)

If you’ve grown these plants and have any tips or information on growing (and eating) them, I’d love it if you left a comment here! I think these are western European varieties that I may face a challenge growing here in the tropics.

© 2011 curiousgardener.com All rights reserved.


Share