Passalong plants: comfrey & vitex trifolia

The little (for now) comfrey plant

Passalong plants are exactly what they sound like: plants that gardeners pass along to other gardeners. That’s very much how I began gardening so many years ago – when my sister gave me cuttings from her garden when she pruned her plants.

Yes, it’s difficult for us gardeners to throw away any of our “babies”, isn’t it? :)

This weekend was another passalong one. My regular “plant fairy godmother”, Skyfiery :), gave into my keeping a young comfrey plant. Ever since reading about it in my favourite permaculture handbook, The Permaculture Home Garden by Linda Woodrow, I was interested in getting this plant because of its many uses – the most important that it’s an excellent micronutrient collector, whose leaves add nitrogen, silica and calcium to the compost heap, or can be fermented in water to be used as a liquid fertilizer. However, it may not grow well here because of our different climate. Well, nothing ventured, nothing gained!

Leaves of the vitex trifolia

What will definitely grow well are the cuttings of vitex trifolia that I got from a member from the GCS forum. It apparently can grow into a large plant, and is grown across Singapore. It, too, has several uses, that I’ll elaborate on in a future post. I simply wanted it because it’s said to have anti-mosquito properties – something that’s important to me because mosquitoes and dengue are an issue where I live. I was quite surprised to hear about the other uses of this plant. As soon as I got back, the cuttings were lovingly prepared, planted and left to take root and grow.

May my new plants grow and prosper in their new home! And many thanks to my fellow gardeners for the gifts their of plants! 8)

© 2011 curiousgardener.com All rights reserved.


Share

Growing the Early Russian sunflower

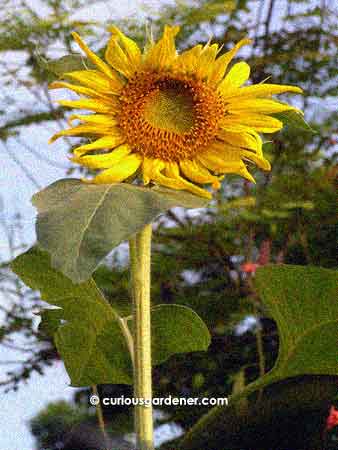
Early Russian sunflower with about half the florets open. I'm always amazed to watch how they open in a constricting spiral.

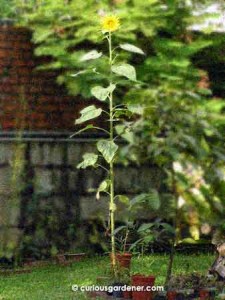
It’s taken my Early Russian sunflower a week to bloom fully. I’m rather proud of it as it’s the first giant sunflower plant I’ve ever grown. Friends and family have come to see the amazing 2.2m tall sunflower and the neighbours are green with envy. *evil laugh*

The Early Russian plant in its entirety - 2.2metres tall!

I’m not entirely certain how I managed to get this plant to grow to its full potential. Maybe it’s because I planted it in the same spot that a tomato plant was in a few months ago and there were still traces of fertilizer there. I’m not sure, but I’m not complaining either!

Anyway, here’s my experience growing the Early Russian sunflower:

  • Sowed in soil in a small pot
  • 1 week to germinate
  • Transplanted to the garden when it still had only seed leaves because it grows FAST!
  • Fertilized weekly/fortnightly with whatever fertilizer I had on hand (but have been advised that it should be even more frequently)
  • Budded in about 3 months
  • Flowered fully within 7 days

Finally, almost all the florets have bloomed and the outer petals start losing their lustre. It will look like the flower is dying, but seeds will be ripening in the flower head for a few more weeks.

The Early Russian sunflower really doesn’t need any support. All my other sunflower plants tended to lean over and needed staking, but this plant had a really strong stem supporting it. I’d estimate the diameter of the base of the stem at around 3cm, which is thick, compared to the around 10 to 15mm that my other sunflower plants had.

The plant even started growing roots above ground to try to support itself better. I’ve noticed that other sunflower plants do this, too, and usually take the hint to add more soil around the base of the plants to help them out.

I’m not sure how much longer the flower will last. Now that all the florets have bloomed and the centre of the flower looks like a pincushion, the outer petals have started fading. I quite liked their wavy look earlier this week – they reminded me of a ring of crazy yellow feathers!

So now begins the sad part of growing sunflowers – the head will start drooping more and more, and the outer petals will die off. The leaves will stay green because they still need to generate food and energy for all the seeds ripening in the flower head that will fatten as the seeds develop. I just hope there were enough pollinators up at that height!

Well, the only thing to do now is to try to get more seeds to germinate…

© 2011 curiousgardener.com All rights reserved.

Share

The winged bean plant finally blooms!

Winged bean flower and buds. I like that they're in a cluster!

Alright, this has been long in coming, but our winged bean vines finally started budding. Six seeds were planted in late February, and the vines grew and branched and grew some more. Long bean plants that were started at the same time grew and matured, bearing beans in just over a month. They have since completed their growing cycle, and still the winged bean vines continued branching and growing without producing any buds …until now.

Yes, the buds started appearing a few days ago, but were either knocked off by the rain or aborted because I suspect they were not pollinated – or they were having a test-run. I’m still waiting to see the first bean growing…

What irks me is that the flowers are quite high up. There are a few more clusters of what are probably buds, but they’re more than 2 metres up and I am not that tall… Looks like I’m going to have to keep a ladder handy from now on!

© 2011 curiousgardener.com All rights reserved.


Share

Growing caixin

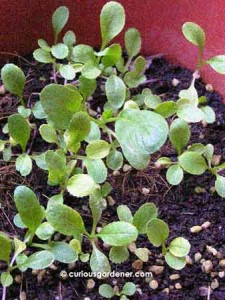
ahem... too many caixin sprouts in the same pot...

Compared to my other plants, I’ve been toddling along a little aimlessly with my leafy veggies. Admittedly, I’ve been distracted growing some other plants that made leafy greens seem rather boring in comparison. However, since I have some caixin plants that have been growing slowly, I decided to do better by them.

This leafy green was really easy to start growing. The seeds were from the common brand of packeted seeds sold in plant nurseries and supermarkets. Surprisingly, there were quite a number of seeds in the packet. They were so tiny that I just took a pinch of the small black seeds, sprinkled them over soil, and watered lightly. They sprouted within a day or so. Within a few weeks, I had an overcrowded flower pot of the plants, and let’s just say they didn’t reach maturity…

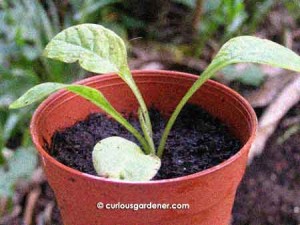
I also discovered that caixin seeds sprout as obligingly on wet tissue, which is actually easier because firstly, you can see the seeds clearly on the tissue, and secondly, they’re easier to transplant because you can see each sprout (root included) clearly. Transplanting seedlings can be tricky because when grown in soil, you can’t see the entire root and sometimes damage it when lifting out from soil.

Caixin seeds germinated on wet tissue

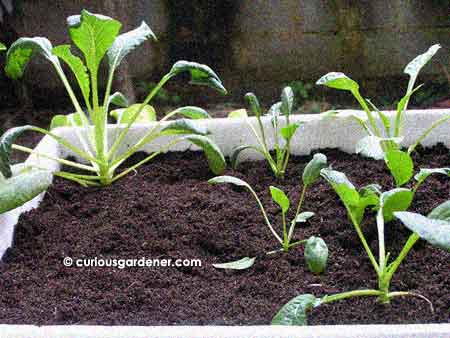
Young caixin plants look very thin and spindly. The leaf stems are very skinny while the roundish leaves on the ends look too big to be on those stems. As the plants mature, though, the stems thicken and provide better support. However, I’ve found that they’re a bit brittle – just brushing against a leaf can cause the stem to break crisply.

Despite being more matured now, my caixin plants still don’t look like those we see sold commercially. In my case, the main stem grew long (compared to the nice compact bunch that’s sold) and the plants kept leaning over. I had to keep adding more soil to prop them up as they grew older – but that’s alright because the added support seems to have helped, and they grow upright now. :D

In retrospect, the plants probably need much more light to look like the commercial plants. Perhaps mine were just leggy because they wanted more sunlight. I’ve moved them to a brighter spot, added some of my new compost and will see what happens next.

Caixin at different stages of growth

Care of caixin is fairly simple – remember to water them well and to fertilize frequently. I didn’t. Maybe now that I’m paying more attention, they’ll thrive and we’ll get to eat some!

© 2011 curiousgardener.com All rights reserved.

Share