New red Zinnia flowers

A few months ago, I was given a set of mixed zinnia seeds, and out of the handful of seeds sown, after extremes of wet and dry weather, and snail and caterpillar attacks, only one plant made it to maturity. I was curious what colour the flowers would be, and to my delight, they were red!

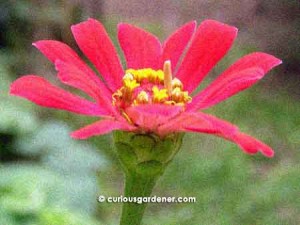
Side profile of the flower

The flowers of this plant are more full than my first try growing the zinnia from seed. I don’t know whether it’s because it’s a different variety or the quality of the seeds are better, but I’m so pleased with the gorgeous flowers!

Top view of the zinnia - I love composite flowers!

This time, because the plant had a less stressful start (thanks to more experience on my part), it grew straight and tall before the first flower bloomed. After that, more side stems started growing, with a flower topping each stem. Since the plant is growing in a flower pot, its size will likely be restrained. Perhaps, planted out in the garden, it could have grown into a big bush. I’ll have to find out the next time I grow this!

Thanks so much to Sky for the gift of the seeds! 8)

© 2011 curiousgardener.com All rights reserved.


Share

How we saved our bird’s nest fern

I remember being impressed by this huge bird’s nest fern planted in front of my aunt’s house – it had a diameter of about 3 or more metres, and a child tossed in there could easily be lost. Of course I was inspired to try growing one of our own. Fortunately, I didn’t have to buy a fern – they grow wild here, on tree trunks and in nooks and crannies in the drains – so it was a matter of nurturing one in a pot and getting it big enough to plant in the cool shade under our old apple mango tree where it grew and thrived.

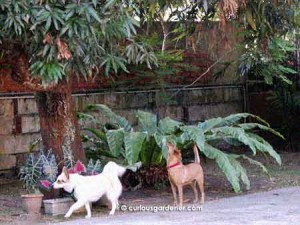
See how the fern flourished under the apple mango tree? Dogs in picture to show size of fern.

What we didn’t realize was that as the apple mango tree got older, it became infested with beetles, causing the tree to rot from within. After a couple of years, the tree had to be removed. The professional tree-cutters did a wonderful job of protecting the fern when they cut the tree down, and the fern looked fine when they were done. Unfortunately, it went into major shock when it suddenly got the full blast of the sun. It stopped putting out new leaves, and started withering slowly but surely.

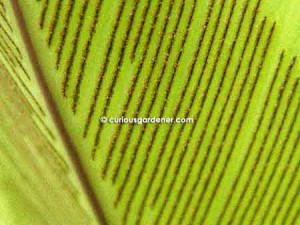
The underside of the fern leaf to show how it has lightened in colour since being exposed to full sun.

We did everything we could, from pruning away dying leaves to watering heavily a few times a day. Nothing seemed to stop its slow demise. Then, a cousin who’s always dabbled in some form of agriculture suggested that we heap mulch around the fern. It would keep moisture in, he said. So, for three months, we dumped all the green lawn clippings around the base of the fern. The fern seemed to pause. Then, about six months after the tree was removed, we finally saw new leaves forming! The fern grows more slowly now, but it seems settled where it is.

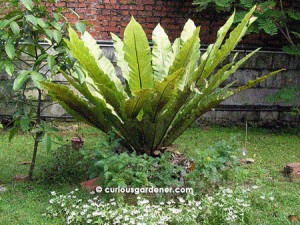
The fern today - a nice focal point I'm building around!

The only problem with the mulching method is that there are a lot of insects living in there that affect the plants I’ve put around the fern. Yup, that’s the gardener’s perennial problem – change something and there’s a domino effect to contend with! We’ve since planted a mangosteen tree next to the fern, but it will be a few years before it grows enough to match the shade that the apple mango tree provided. In that time, who knows how the garden will have evolved?

© 2011 curiousgardener.com All rights reserved.


Share

A gardener’s follies

One of these things is not like the other... Reminder to myself to not mix up my seedlings!

There are some things a gardener just should not do, and whoa, have I fallen into that trap!

Firstly, since I revel in growing my plants from seeds, I made the mistake of sowing too many seeds at one go. When they all germinated at the same time, I didn’t cope well with planting them all in proper homes immediately.

When you grow plants from seeds, you also need to label them properly. I later realized that in my laziness in using initials, rather than writing the whole plant name, I had two sets of plants with the same label! I had to wait until the plants grew a bit bigger to try to differentiate the dwarf from the bigger plant – and even then, I still got it wrong!

In my recycling efforts, I’ve been using all kinds of plastic containers to pot my young plants – mostly cut-off bottle ends and plastic cups of various sizes. Those are alright for small plants, but you’ve got to remember to transplant them to better homes before too long.

Heh.

So, no thanks to my slow or no reaction, I now have all kinds of stunted plants growing…
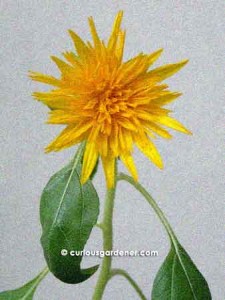
"Miniature" Sungold sunflower - looks normal, but is only one-third the size it's supposed to be!
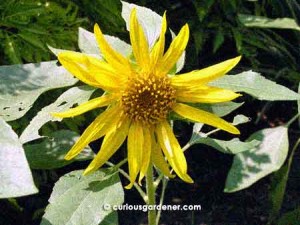
Mutant, looks-absolutely-nothing-like-it's-supposed-to Sunspot sunflower!
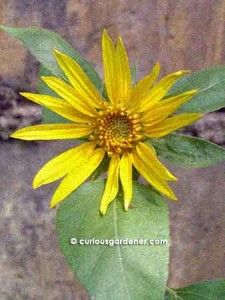
Half-a-metre tall sunflower that's supposed to be four times that height, with a bigger centre and three times as many, broader petals.
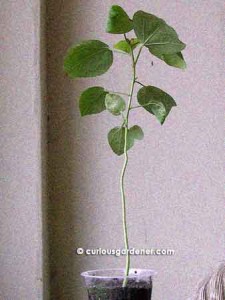
20cm tall, root bound and already starting to bud roselle plant growing in a plastic cup. It should grow strongly once I've transplanted it, burying part of the exposed stem as well.

Somebody smack me, I’ve been a lousy caretaker of my plants… :(

Besides that, I also have to start sowing seeds all over again, and look after the plants properly when they do sprout. I will get them to grow as they’re supposed to! Eventually…

The moral of this story:

  • Don’t grow more plants than you can take care of.
  • Label the pots that you sowed the seeds in properly.
  • Keep abreast of your plants’ needs, or feel the pain of seeing them not reach their full potential.

© 2011 curiousgardener.com All rights reserved.


Share

Growing sunflowers from seeds – in retrospect

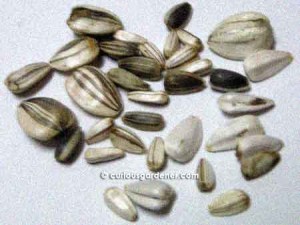
Just a few of the different kinds of sunflower seeds...

Now that I’ve tried growing a few varieties of sunflowers, I can see that my favoured method of sprouting ‘em in a ziplock bag doesn’t work all the time. :(

Certain varieties can germinate within 24 hours; some take their time, germinating one at a time; others just sit there until they turn mouldy.

Yes, I went a little Ziplock crazy for a while, until I realized some varieties didn’t respond at all. So I experimented with regular sowing and surface sowing, and got mixed results.

Generally speaking, the dwarf varieties seemed more responsive to ziplock germination; they’re also quite happy with surface sowing. The mid-sized to huge varieties were temperamental with all methods of attempted germination – I had lots of mixed results with them – and I have yet to succeed in germinating some varieties at all.

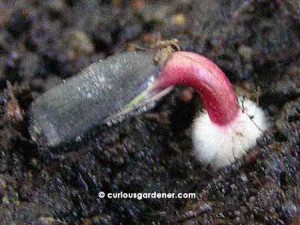
A surface-sown germinating sunflower seed, with seed case still in place. Don't the growing root filaments look like furry tribal leggings?

Even after the ziplock sown seed starts germinating, it may abort along the way. I’ve had several cases of happily transferring the germinated seed from the wet tissue to potting mix, only for nothing more to happen; or for the seedlings to grow for a while, and then run out of steam and die.

There could be any number of possible reasons for all this. It could be due to the stock of seeds. Maybe they’re a little old – seeds do have a certain life span before they lose their viability. Or maybe they’re basically difficult to grow. Or maybe they don’t like our climate. You just have to plant way more seeds than you want plants, because there will be casualties along the way.

I’ll just keep trying until I deplete my stock of seeds…

© 2011 curiousgardener.com All rights reserved.

Share