Second ginger harvest

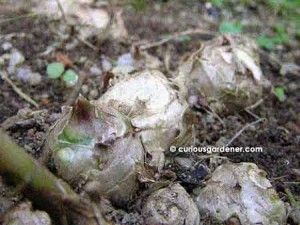
Nubs of ginger above ground after the leaves have died out.

It’s been about 11 months since I started growing my culinary ginger from rhizomes bought from the supermarket, and I figured the time was coming for the rhizomes to mature. After all, I’d read that it takes 8-10 months for this to happen. However, I was waiting for the plants to die out first, which is supposed to be the signal that they’re ready – which they finally started doing.

The cute thing about culinary ginger is, it grows in a line – so when the stems and leaves finally die out, you’ll see little rows of ginger nubs sticking out of the earth! It’s rather orderly…

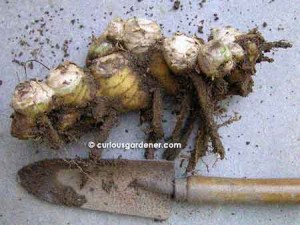
I just wanted to see what a single rhizome would look like, so I carefully unearthed one row of the ginger nubs, and got this:

11-month ginger rhizome. Not too shabby...

How thrilling is that? 8) It’s more impressive than the one we dug up four months ago, but I’d like it to be even more impressive! For this, it needs to have stayed in the ground longer – which the other ginger plants will continue to do, until we need some in the kitchen again.

I did, of course, break off the bits with emerging growing buds, to plant or give to other curious friends. Yes, there are more of you coming out of the woodwork now – good for you! If you’re going to grow plants, they might as well be edible ones that you can benefit from.

Some of my earlier experimental ginger plants are growing extremely slowly, so I’ll probably transplant them over the coming long Chinese New Year weekend. From what I’ve observed, yes, ginger needs some shade to grow well, but it needs more sun than shade – so I have to be more selective in where I plant them. I have a nice spot in mind, and hope it will become known as the “ginger corner” of the garden in time to come…

© 2011 curiousgardener.com All rights reserved.


Share

How to harvest sunflower seeds

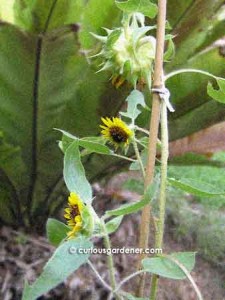
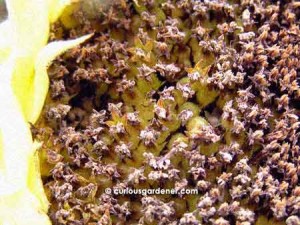
Seeds ripening in the sunflower flower head. See how succulent they still are?

I had a lot of fun growing my first sunflowers from the seeds given to me by DG, a fellow gardener, and was determined that I would follow his example of harvesting the seeds so I can also pass on the joy (seeds) to other gardeners.

One of the first things I learned was the need to wait for the seeds to mature first. Unfortunately, this involves allowing the flower to die and dry on the plant. Many people think that once the flower finishes blooming, the seeds are ready to be harvested. This is not true. If you look closely at the flower head and separate the seeds clustered there, you’ll see that they are yellow, moist and still fattening up.

Smaller sunflowers growing along the main stem while the main flower slowly dies.

At this point, there may still be some smaller sunflowers growing along the main stem. My theory about them is that they’re there to keep the plant alive while the seeds in the main flower head ripen. It’s sort of logical, isn’t it?

Coming back to the seeds, you have to wait until the whole head and stem just behind the head dry up before removing the flower from the plant. If you want to remove it sooner, then it’s recommended that you wait until the back of the flower head starts yellowing, then cut off the flower with about 30cm of stem with it, and hang it somewhere warm and dry until the seeds are ready to be extracted. For me, I left it to Mother Nature, even though there’s the risk of the seeds getting mouldy, or dropping and growing there. I’m sure the snails will get to any seedlings that manage to grow, though. I just waited until the entire stem leading to the flower had turned as brown as the flower head, then removed it from the plant. I then kept it in a warm, dry place for another couple of days to let it dry completely.

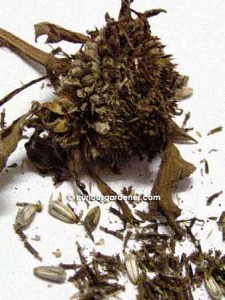
Seeds and chaff from the dried sunflower head. I found that most of the viable seeds were along the outer edges of the flower head.

So here’s the fun part – getting the seeds.

Take the dried flower and hold it over a big sheet of paper or a small bucket or bowl, if you wish. Rub your thumb or finger over the dried seeds, like you would over the bristles of a toothbrush. This is, to me, an almost magical experience, because there you are, brushing tightly packed chaff, when suddenly a clean, perfectly formed seed pops out from it! Yeah, I’m easily pleased… :P

Do note that the seeds slip out easily and will go flying if you’re too vigorous, so don’t be over-enthusiastic! Just keep going slowly until you don’t feel any more hard, rounded seeds on the flower head, then sort the good seeds from the non-viable ones. The good ones will look like what you first planted – fully formed and rounded on one end, almost like grains of rice. Be disciplined and discard the narrow, malformed and skinny seeds. Then take the good ones and plant them, store them or eat them (if they’re edible) – the choice is yours – and the possibilities begin again…

One last note: don’t leave the flower alone for too long after harvesting it, because all kinds of insects will set up home in there! Trust me on this… :|

© 2011 curiousgardener.com All rights reserved.

Share

Understanding permaculture

I first heard the term permaculture when I was looking for tips on successfully growing ginger. I now know that ginger is one of the easiest crops to grow, but at that time, had already botched up one attempt. To me, the person who wrote about it had a fascinating attitude – just do the planting and let nature take over (generally speaking). It made a lot of sense – after all, nature knows best, right?

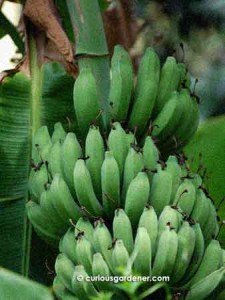
Several of our neighbours have banana trees. Tempting bunch, isn't it?

Now, I’m not exactly a tree-hugger, but I have the highest respect for nature. It’s funny how we try to shape our gardens to our ideals, yet once we slacken our efforts, nature just continues. So, why fight it?

I got a lot of interesting information from a site called Tropical Permaculture. It’s a good place for newbies to start from. What I especially liked was that it was one of the first sites I encountered that shared a climate similar to ours. On top of that, there was a tonne of information about growing different plants the permaculture way.

That was the snowball that started rolling downhill for me. I needed to know more, so I checked out our local library catalogue but found it lacking where permaculture was concerned. So, I searched online and ordered a book called The Permaculture Home Garden by Linda Woodrow. Once I got it, the book was almost glued to my hand. Okay, we may not be able to use it wholesale in Singapore because we’re so land scarce and we don’t have some of the plants mentioned, but the principles can be used; we just have to adapt them a bit.

Here’s the gist of this book (out of respect for the author, highly condensed):

  • permaculture, in layman’s terms
  • permaculture layouts
  • working with earth
  • managing plants
  • managing pests

I found this an easy read because it was well written and just right for permaculture newbies. There are some assumptions that we have a certain level of gardening knowledge, but on the whole, it’s an inspiring read that gets down to the nuts and bolts of many things. It is, however, written for those with an actual patch of garden (big or small), although apartment gardeners will definitely learn from it. What I like and want to apply are:

  • soil replenishment practices
  • companion planting
  • learning how to work with/around the creatures that already live in the garden
  • create a balanced, harmonious garden that generally maintains itself

Unfortunately for me, I am a kinesthetic learner, which means I work best by doing things by touch and feel rather than applying something from a book. So, like the inventors of the world, I will be experimenting a lot to find the best way to make my garden permaculture-worthy. I’m happy with anticipation for now. My learning curve continues!

© 2011 curiousgardener.com All rights reserved.

Share

Mulberry cuttings, 5 months on

My three mulberry cuttings seemed to be doing fine for a few months, and I was waiting for the roots to start showing at the base of the flower pots so I could re-pot them. They had all grown at least one or two new stems of about 30cm, and my anticipation was rising with each new leaf.

When I saw the first root start to show at the bottom of one pot, I thought I’d better be patient and give the cutting time to develop a proper root system. Soon, the other two plants caught up, and I began to look for bigger pots to transfer the plants to.

Before I could do so, the leaves began to turn brown! Spots began to develop, and then the edges started darkening. Before I knew it, all the leaves were some shade of brown, and began dropping, one by one! My heart sank. All these months and weeks of keeping the plants watered and happy in their bright-shaded corner began to spiral down the drain.

The last mulberry leaf... and the new leaf beginning to bud...

In desperation, I put the worst-off plant with its last remaining leaf out in the garden where it would get morning and late afternoon shade, and about four hours of full sun in between. Somewhere in the back of my head, I figured that putting it in the conditions I wanted the plant to grow in would be a form of CPR for it. However, the leaf continued to brown, and finally it dropped off, leaving behind the sad looking stem sticking out of the pot.

The other two plants were also down to their last leaves, and I sadly began to think of asking for another set of cuttings to replace them. This was not supposed to have turned out this way. I was supposed to be re-potting cuttings with lush growth that needed pruning.

I think the gardening gods like yanking me around a lot. After making me think that the first pot that I left out in the garden was dying, it actually began to sprout new leaves! I was astounded to see the tiny green budding at the apex of the stem when I was admiring the yellow cosmos flowers next to what I thought was the dying mulberry plant. Yes, in a twisted way, I was hiding the dying plant next to a flourishing one to soften the blow to myself. Whatever the case, the mulberry plant is still alive! And since the CPR in the garden helped it, I’ve put the other two pots out in the open, too. They’ve both also shed their last leaves, but have new ones budding right now. Once they’ve stabilized with new leaves, I’ll transplant them to bigger pots.

At this point, my mulberry journey is only five months along.

© 2011 curiousgardener.com All rights reserved.

Share