Red Lady Papaya progress

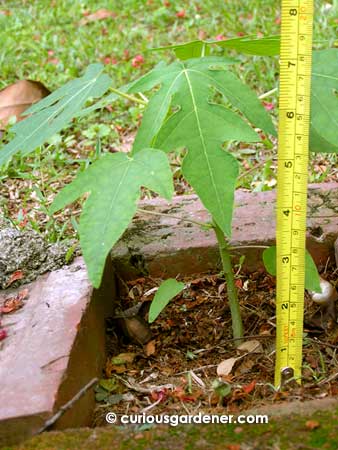
Already resembling a miniature papaya tree...

A month on and my papaya plants are growing at different rates. Some still look only slightly bigger than the 3-week old seedling (but with more leaves), and a couple look like they can’t wait to become big trees.

The biggest “baby” is about 18cm tall and is sporting the familiar palmate papaya leaves. It gets indirect sunlight for a few hours, and full sun until late afternoon. It’s possible that this could be a good growing condition as the two seeds I planted here grew exceedingly well, even surpassing the first plant that had the best growth spurt. I couldn’t help but break the golden rule about not transplanting the second plant because it was growing too well to cull. Whether it will survive remains to be seen, as I committed the “crime” just yesterday.

The first plant that seemed to grow fastest gets more sunlight than the fast growers. It is still growing steadily, but not as rapidly. In contrast, the other two pairs of plants that are growing oh so slowly get the full blast of the sun for most of the day. I may move some potted plants or grow some annuals near them to provide a bit of a sun break, just to see if that helps. The other two locations are near taller plants that give some shade, and maybe that makes a difference. Who knows? Anyway, the good thing is that all the papaya plants are still growing…

More on the Red Lady papaya saga…

© 2010 curiousgardener.com All rights reserved.


Share

The tomatoes are almost there

The first tomatoes beginning to ripen.

The wait is almost over!

After weeks and months of hovering, I’m about to learn what kind of tomatoes I’m growing. Yup, that will teach me to plant seeds from packets where the instructions are in a foreign language. It appears I’m growing a larger cherry tomato – and to be fair, the fruit on the vine does resemble the picture of the fruits on the seed packet. I just wasn’t sure about the scale of the photo and was hoping they would be regular sized tomatoes.

The fruits are starting to blush a sweet salmon-pink, and I’m guessing that means they’re as big as they’re going to grow. They’re currently about 5cm in height and 2-3cm across.

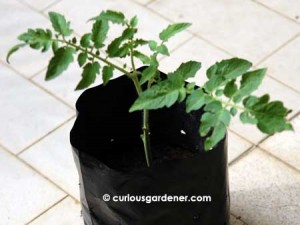
Cutting from the tomato plant growing steadily.

The plant has been a whitefly magnet, and I’ve had to prune the affected leaves and more to improve air circulation and allow sunlight through to all the leaves. However, I believe the pruning is beneficial to the plant.

Out of sheer curiosity, I also planted a couple of suckers that I pruned off. Two out of three took root and have been growing steadily. I think I’m going to have too many tomato plants on my hands if I keep this up, because the first plant that’s growing is a steady fruiter. There are almost 20 fruits currently developing on it, with lots more flowers on the way. And I have another two plants growing as well.

Tomato plant growing against a tall support stake.

I haven’t kept strictly to the credo of cutting away all the suckers. You know me… I have to experiment with different things before I decide on a future course. The first plant has branched out quite a bit, and I’ve built a support for it as it grew and spread. The second plant will be more of a main stem only plant – it’s already got a tall, strong support stake that it’s growing against, and I’m interested to see just how high it can grow. With my luck, higher than the two metres that the support stake is. :D

I reckon the tomatoes should ripen completely in the next couple of days. I hope the whiteflies – or any other pests I haven’t noticed – haven’t affected the fruits in any way. In the meantime, it’s maintenance and feeding as usual.

© 2010 curiousgardener.com All rights reserved.


Share

The Great Bangkwang Experiment (Part 2)

Part 1 of my Great Bangkwang Experiment involved growing the plant from a tuber that I bought from the market. Now, in Part 2, we look at growing the plant from seeds derived from the plant grown in Part 1.

The first bangkwang pod to mature - see the seeds inside the split pod?

It took the bangkwang/yam bean pods about two weeks to mature from flower to big pod, and more than a month after that to reach seed-bearing stage. Trust me, I was keeping a sharp eye on those pods, waiting for them to dry enough so I could hear the seeds inside rattle. Finally, I saw a pod mature enough to split open, revealing some nice healthy looking seeds within.

I took that as a sign that I could help myself to the pod, and plucked and split it open. Seven pale orange-brown seeds sat inside, on alternate sides of the pod. They looked healthy and fat, and I couldn’t wait to plant them! However, I didn’t have pots available, so those seeds went into keeping for then.

Meanwhile, I told myself to keep checking on the other pods so I could harvest more seeds. Naturally, I forgot, and naturally, a couple of pods split open, quite enthusiastically. I’m never on top of my weeding, and there are always weeds and grass growing everywhere. So, I had a nice little treasure hunt on my hands, searching for the dispersed seeds among the grass and plants around the base of the plant. I found most of them within a metre or so of the mother plant, but the furthest one was about two metres away! Talk about explosive dispersal power!

The first bangkwang sprout.

Since it had rained that morning, I figured I’d better plant all the recovered seeds. I didn’t want them to sprout or rot if kept away. By this time, I had some pots available, so eight seeds were planted.

Two-day old bangkwang sprout.

Four days later, the first seed began to sprout. Over the next several days, so did the rest – including one that I had missed finding near the mother plant. I decided to let it grow there and see how a wild plant would fare, compared to the rest I would plant in selected locations.

Can you spot the bangkwang seedling amidst all the weeds? :|

As for the seedlings in pots, I’ll find growing spots for them and probably give away some of the seeds since there are so many.

So finally, Part 2 of the Great Bangkwang Experiment is underway!

© 2010 curiousgardener.com All rights reserved.


Share

Recycling used PET bottles

I was trying to be environmentally conscious and decided to try to find ways to recycle used polyethylene terephthalate or PET soft drink bottles. Here are some of my “creative” solutions:
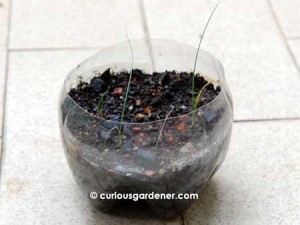
Young chives growing in a recycled bottle-pot.

PET bottle as a flower pot… This was my very first use of the recycled plastic bottle – to cut it in half and use the bottom as a flower pot. I like to experiment with different pot heights, and normally use the really short ones for germinating seeds in. Taller pots will house plants with deeper roots.

Young tomato plants in their SWCs.

PET bottle as a self-watering container… Great for plants that need lots of moisture, like mint, or for young plants. I use the screw cap that sits in the water as a water regulator – the looser it is, the more water enters; the tighter it is, the drier the soil will be. Of course, the trick is learning how much to tighten the cap. It varies, depending on the potting media, the amount of water in the reservoir below, and of course, the weather. The hotter the temperature, the faster the water is used up. But, at least your plants are not as much at the mercy of the heat.
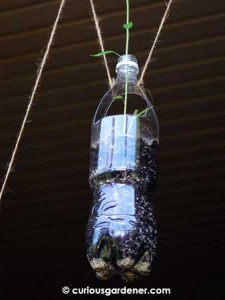
Recycled bottle as a hanging flower pot.

PET bottle as a hanging flower pot… This was one of my more recent attempts. Using a strong cutter/blade, I created a pair of large holes near the top of the bottle where I wanted the plant to grow from. I also wanted to have room for a good amount of potting mix, so those holes had to be as high as possible. Using the tip of the blade, I poked small slits in the base of the bottle to allow excess water to drain from. To avoid loss of the small particles of potting mix, I put a thin layer of vermiculite right at the bottom first. So far, that seems to work. The final consideration was how to hang the bottles. My first idea was a noose around the bottle neck, but that would have allowed the bottle to swing too much. So I went with the idea of using two anchor points, through the holes for the plant to grow through instead of only around the bottle neck, for better stability. That works well. To jazz things up, you can tie a row of hanging bottles at different heights – and if you have any plants below, they will benefit from drip watering from the hanging pots!
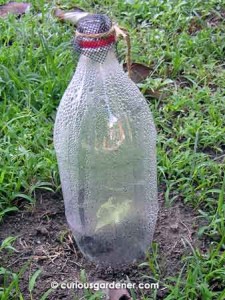
Recycled bottle acting as a plant protector.

PET bottle as a young plant protector… I’ve been a little unlucky with my sunflower seedlings lately, and decided to go a little overboard when it came to planting them outside, especially the very young plants. The biggest danger to them would have been snails, so it seemed a perfect idea to isolate each in their own little “bubble”. I cut off the bottoms of the bottles, trying to retain some height to allow the plants to grow bigger. To further deter snails and other insects, I tied a small piece of netting to cover the top but still allow air to circulate. So far, no snails or insects have breached the protective “bubble”.

Of course, I also use the bottles as-is for my mixtures of liquid fertilizers, but that doesn’t really count as a “creative” solution, does it?

The next question that begs to be asked is how long I can continue to use these bottles before the plastic starts deteriorating and becomes a contaminant? I know that heat speeds up the deterioration, so those bottles that get full sun will have only one or two cycles before I finally put them in the recycle bin. That should be safe enough, and I will have used them beyond their original purpose. I feel good about that.

So, do you have any other ways of recycling bottles?

© 2010 curiousgardener.com All rights reserved.


Share