It was sometime in July that someone at the GCS Forum suggested doing a mass order for some Taiwanese Red Lady papaya seeds. He had heard about the plant from a commercial grower and was eager to grow them, too. The only problem was, the seeds were from a seeds wholesaler, and that meant having to buy in bulk.
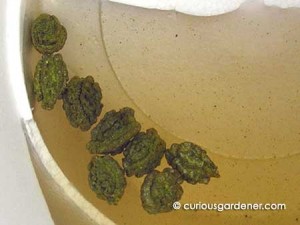
The papaya seeds soaking in a diluted solution of seaweed extract.
Now, you may laugh, but the smallest order we could make was for 10 grams of seeds. Ten grams? you may ask incredulously. It doesn’t seem like a lot, but for that weight, you get hundreds of seeds! This is why gardening hobbyists seek company when they want to get good quality commercial seeds from seed merchants – you don’t want or need to be stuck with that many seeds, or the price tag that comes with them.
It sure didn’t take long to attract other gardeners to the idea of growing papaya trees that will bear good-sized, commercial quality fruits. We made the purchase quickly, and I had my seeds by mid-July. They looked… funny… in an odd way – like miniature, roundish dehydrated green prunes (for want of a comparison). If there was one thing I didn’t expect, it was for them to be so wrinkled! But, their being dry explained why we got so many seeds for that weight. I shared some of them with others who had given me plants and seeds, and the rest I kept away while I did some research on the best ways to grow papayas, because this was my maiden voyage growing these fruits.
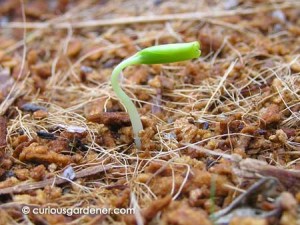
Papaya sprout slowly unfurling.
Climate would not be a problem. We have lovely tropical weather all year round. August through September is usually horribly hot, dry and hazy in Singapore; rain in this period is normally rare. However, the weather patterns seem to be changing and we’ve been getting frequent heavy downpours since July. It’s still hot on days when it doesn’t rain, but when it rains… boy, does it pour! Thankfully, I don’t live in a low-lying area, so the floods that have affected parts of the country haven’t done any harm to us. However, I worry a little about the poor sweet potatoes and ginger rhizomes growing underground… 
One thing I read at the Tropical Permaculture site was that papaya plants don’t take well to transplanting. I know some people do grow their papaya plants the traditional way – from seed mixture to transplant pot, etc. – but this site specifically recommended planting the seeds directly. Since I had disregarded their excellent advice about growing ginger (because I wanted to experiment for myself), I thought I’d save myself trouble and take it more seriously this time. After all, these were special seeds.
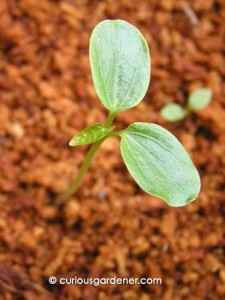
Papaya seedling with the first true leaf growing.
So, when a suitable, long weekend came up, I got out a few Red Lady seeds and soaked them overnight in a mild solution of seaweed extract. I’d heard that soaking the dry seeds would help rejuvenate them; I’d also read that seaweed extract is a great seed germination stimulant. So the seaweed solution was a great two-in-one idea, as far as I was concerned.
The seeds didn’t seem very plumped up to me the following day, though, but I proceeded with my plan to plant them. I wanted to grow at least four trees, because you can’t tell what gender the tree will end up being, and you need at least one male tree for pollination purposes, and the rest, female or hermaphroditic. So, at each of the four locations I prepared, I planted two seeds, with the intention of keeping the stronger plant at each spot.
Of course, the possibility that I could be culling a perfectly good, potential fruit-bearing female or hermaphroditic plant while keeping a sterile male is a niggling worry at the back of my mind, but I’ve got to be brutal here…
Anyway, the four pairs of seeds were planted directly in the garden on a sunny day, and to protect them, I laid on a thin layer of cocopeat as mulch, and watered them with a bit more diluted seaweed extract, for good luck.
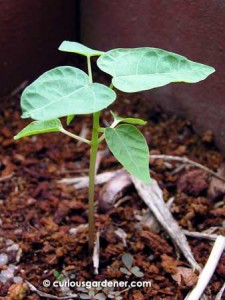
Papaya seedling at 3 weeks old.
A week later, a little seedling broke through the mulch. Since this was out in the garden where grass and other light seeds land and grow everywhere, I didn’t get too excited – especially knowing that papaya seeds can take 2-3 weeks to sprout. One week was just too soon. But, the sprout was in the right location where I had planted a seed. The next day, another pair of sprouts poked up, and I started to wonder…
I sort of got my answer in the following week, when more little seedings popped up where I had planted the seeds. All of them had identical looking shiny oval seed leaves, so I figured it was safe to conclude that we had a 100% germination rate for the Red Ladies. It still amazed me that they had sprouted within a week, when I’d read that they would take two to three times longer.
So now the lesson in patience begins. The plants are almost 4 weeks old now and one has already been decapitated by an insect. Fortunately, the second one at that location looks strong and healthy. Looking at the other sets of pairs, I can see a slight difference in growth in some of them already. That should make the culling decision easier…
In the meantime, we’ll keep watching over these babies and will let you know how they develop in the weeks and months to come…
© 2010 curiousgardener.com All rights reserved.
![]()

