Ginger blooms

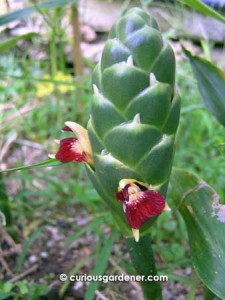
Flowering zingiber officinale.

My ginger plants – zingiber officinale or culinary ginger, in this case – are growing in their clumps around the garden. I had deliberately planted each clump in different locations to see how they would develop. The particular clump I’m referring to now is the one that had the hardest start – I’d planted it in full sunlight, where it had a very slow and rocky beginning. However, once my long bean plants grew and covered the trellis I had set up to grow above the ginger plants, the little rhizomes had a second wind and began to thrive in the semi-shade. They established themselves so well that even after the long bean plants died out, they managed to hold their own and grow well with less shade.

I was doing a bit of weeding around them recently when I noticed a flower stem growing in the middle of the clump. It looked like a cob covered in green scales growing at the top of a long stem. A week later, I noticed little white tips beginning to emerge along the edge of each “scale”. I was surprised, because I didn’t think that edible ginger plants flowered. Duh. :)

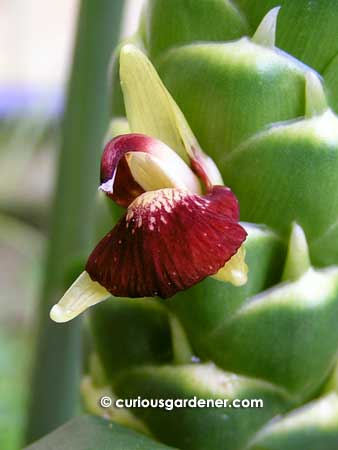
A week or so after that, I was passing by when a flash of colour caught my eye. Upon closer inspection, I found that a small, deep red orchid-like flower had grown where the white tip had been. Just look at the close up of it below… it’s gorgeous!

Isn't that gorgeous? Up close and personal with the ginger flower.

I don’t know why the flowers emerge only individually or in pairs – it would be amazing to see the entire head in bloom!

Here’s info I got from flowersofindia.net:

The inflorescence (flower) grows on a separate stem from the leaf stem, and forms a dense spike, up to 3 in tall. The bracts are green with translucent margins and the small flowers are yellow green with purple lips and cream colored blotches.

Hmm, so those are the proper terms for the parts of the flower… Well at least you don’t have to be an expert to appreciate the beauty of nature!

© 2010 curiousgardener.com All rights reserved.


Share

How to germinate sunflower seeds

I’ve been trying to grow sunflowers for the last few months but have had the worst luck. Kids are supposed to be able to grow them, aren’t they? But the Sunflower god seems to be frowning down on me for some reason, even though I’ve been quite persistent in my quest to start growing the plants.
My "biggest" sunflower plant a few days before it departed for the big greenhouse in the sky...

The first time I tried growing them from seeds, I used earth in paper pots. It seemed fairly successful – only one out of three seeds didn’t germinate. However, one seedling eventually died, and the other grew to the “great big” height of about 15cm before it, too, died. Its demise could have been because of the persistent rainy weather we’ve been having lately – sunflowers don’t like wet conditions.

The next time I tried growing them was direct into a flowerpot, using fresh seeds I had been given. Nothing grew. Was I not keeping them damp enough? Or putting the seeds the wrong way round? Would it really make a difference? Grr! So my next attempt was direct to the soil in the garden, using purchased seeds, laid horizontally, just in case. Two seedlings grew, but withered away after a couple of weeks. It could have been the rain that interfered again. I don’t know.

By this time, though, I was pretty frustrated. I was determined to succeed at getting the seeds to germinate! That was my first goal. The next would be to get them to seedling stage, and then to be planted out and grown to maturity. Just take things step by step…

Germinating sunflower seeds just removed from their ziplock environment. Notice how they're all at different growth stages?

So for my next attempt, I decided to take a different tack. I laid some fresh sunflower seeds on a paper napkin that I folded over the seeds. Next, I dampened it with a mild seaweed solution (without making it soggy), and sealed it in a ziplock bag. Deciding to be casual about it, I left the bag to one side and forgot about it for three days.

Wonder of wonders, some of the seeds had sprouted! The little air I had left in the bag, for fear of fungus or mould forming, had been used up and the ziplock bag looked like it had been vacuum sealed. The wet napkin looked a bit drier and droplets of water condensation had formed on the insides of the bag. When I opened it, I found the paper napkin to still be damp. Several seeds had sprouted, and I saw them at different stages of germination – some had the root just poking out from the seed while others had grown tap roots – the longest, up to 3cm – and looked very much like a bunch of little bean sprouts. I had to extricate the longer roots from the wet tissue before transplanting them to small paper pots where I hope they’ll grow to a decent size so I can plant them out. Baby steps, remember? :)

So what did I learn from this exercise?

I now know that sunflower seeds sprout from the narrow point, and not the broad end, as I’d assumed. It seems that the root pushes out from the narrow part, and the seed leaves remain encased in the seed casing until they split it enough to shed it.

I also know that the seed casing needs to be softened enough for germination to take place. Otherwise, the seeds remain too hard and that’s the end of that story.

I also know that sunflower plants do not like too much rain! So perhaps I’ll try to grow my seedlings in pots until we learn from our local meteorologists that this freaky rainy weather we’ve been experiencing is going to end. Not that I’m complaining about the rain – in its absence, we’d normally have heat and haze at this time of year – not my favourite combination! So I may have to go invest in some bigger flower pots, and maybe this time we’ll finally have some nice cheery sunflowers blooming across the garden in a few months. Heck, if people can grow Mammoth sunflower plants in flower pots, I can grow regular sunflowers in pots!

Sunflowers, here I come…

© 2010 curiousgardener.com All rights reserved.

You may want to read: Growing sunflowers from seeds – in retrospect


Share

Thai basil flowers

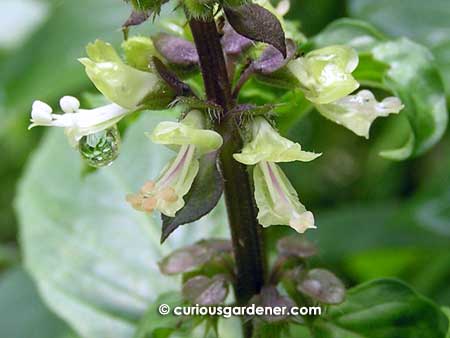
Thai basil flowers.

The Thai basil that I grew from cuttings and planted out in the garden is doing extremely well. Not only have the plants flourished and branched out, but they’ve already started flowering. Clusters of gorgeous tiny white flowers are lining the tall, dark purple stalks in a beautiful contrast of colours that I find very appealing. Soon, those flowers will fall off, leaving little, shiny black seeds to form in their place, which will in turn be dispersed when they’re ready, to let new basil plants start growing. And these will be the ones that we will use for culinary purposes, since the flavour of the leaves changes once a plant goes to seed. I did attempt to pluck away the flower spikes from just one of the plants, but they’re such fast growers that I missed a day or so checking on them, and lo and behold, there were flowers forming!

But, who’s complaining? They’re gorgeous!

A drop of water clings to the flower of the Thai basil after a late morning rainfall.

© 2010 curiousgardener.com All rights reserved.


Share

Mulberry cuttings at 3 weeks

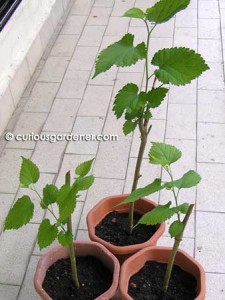
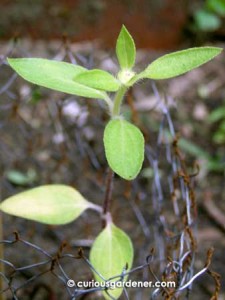
Isn't this decent foliage for 3-week old cuttings?

Well, I’m down to three mulberry plants now. One of the cuttings died last weekend. I saw a 1cm hole in the earth next to the cutting and have no idea what created it. By the next day, the young leaves that were growing started losing their fresh, apple green colour, and were dried up two days later. The bottom of the cutting, when pulled up, looked soggy and smelled rotten. Either it was a case of too many gardeners killing the plants, or I wasn’t meant to have four plants growing.

Despite that, I’m still happy, because the remaining plants are doing pretty well. There are quite a number of leaves growing right now, and I think it’s because I was given cuttings from the thicker part of the stem. I will continue to try to restrain myself from doing anything to the cuttings apart from watering them until they need to be re-potted in bigger homes.

© 2010 curiousgardener.com All rights reserved.


Share