Easter lilies

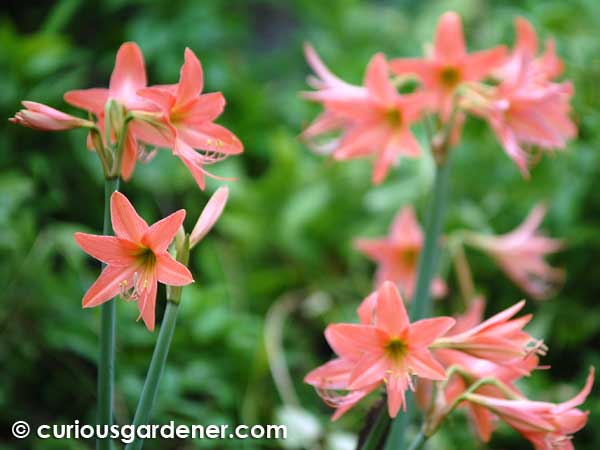
Our gorgeous orange Hippeastrum hybrids

It’s Easter and our lilies are in bloom. Oddly enough, in our tropical, equatorial climate, these plants always seem to know that Easter is here because they’re always in full bloom at this time of year. Well, this particular variety of lily anyway.

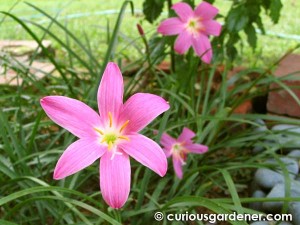
Zephyranthes

Our thunder lilies also seem partial to Easter. They don’t bloom often, though, but they’re gorgeous when they do.

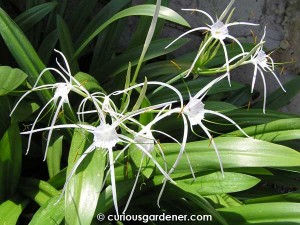
Spider lilies

I can’t say that our spider lilies are affected by season, apart from the fact that they decided to show how much they liked the change in weather. Once the dry spell was over, they seemed to take a deep breath and suddenly burst into bloom. We have a nice little cluster of them and they look pretty and… spidery… with the clusters of flowers. These bloom throughout the year.

Wild lilies

My favourite are last — wild lilies that sprout up wherever and whenever they want in our garden. However they get where they do, their leaves blend in with the grass, and the plants are only noticeable when the flowers bloom. They’re always a pleasant surprise, especially when they appear in clusters. I find them finicky because they grow where they want to grow, and not always where you put them. I’ve transplanted them a few times, trying to make a bed, only to have them die out (or so I thought). Then, months or even years later, they suddenly pop up where I’d moved them to, and I find myself happily surprised once more.

However you celebrate Easter this weekend, I hope you have an enjoyable one. Happy Easter! :)

© 2010 curiousgardener.com All rights reserved.


Share

Growing sweet potatoes from cuttings

Not that I have a fixation on sweet potatoes, but that’s one of the things currently growing in this curious person’s garden…

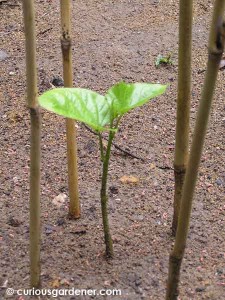
In an earlier post, I shared my joy of watching a sweet potato sprout from a tuber. That joy was twofold, because the more the plant grew, the more propagation material I would have. This first plant is what I call the “mama plant”, because it’s going to spawn me more plants.

Preparing the cuttings

My cuttings of different lengths. Will there be any difference in the quality of potatoes (besides how deep to dig) at harvest time?

While doing my research on how to propagate sweet potatoes from cuttings, I read differing opinions regarding the length of the cuttings or slips to be planted. This ranged between 15 to 30cm. So, me being me, I waited until I could get cuttings of up to 30cm, and then I made cuttings of different lengths. What can I say… I really want to know what the difference is! :D

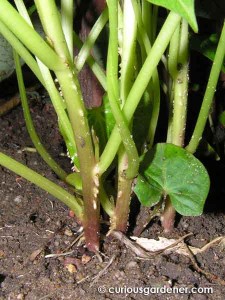
One interesting thing I noted – as Mama Plant grew bigger, the older stems began to sprout roots at the base of the stems! I’ve heard that the sweet potato plant is a voracious spreader, and I guess this is one of the ways it helps itself to do so. Anyway, because of this, my cuttings that were supposed to be 30cm long were in fact a bit longer, because I wanted to incorporate the rootlets in my cuttings. The shorter, 15cm long, cuttings didn’t have any roots. However, they’re supposed to sprout roots at the leaf nodes underground – just like my mint cuttings!

Preparing the bed

Roots beginning to form along the stems

Growing tuberous plants meant that I needed to make more preparations for the future sweet potato bed than I normally would for other plants. Yes, I’m curious but don’t want to do too much extra work. If I learn all possible tricks, I could do less work and let Mother Nature do the rest!

Anyway, I had to loosen up the earth where I intended to plant the sweet potato cuttings, and make sure there weren’t any stones or hard objects underground that would hamper the growth of the potatoes when they begin to form.

(Yes, I am optimistic that we will get sweet potatoes, unlike normal potatoes, because families here grew them for food while under the Japanese Occupation during WW2. Normal potatoes don’t seem to grow in our equatorial climate – I’ve tried!)

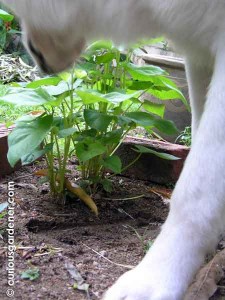
Another curious (but not a) gardener. How I wish my dogs could be trained to dig on demand! And learn not to show interest in my plants by stepping on them...

Preparing the potato bed is quite a necessary thing to do especially in this old garden where you can unearth all kinds of things like old broken bits of glass and china to rusted bits of metal and old kids’ toys. Our younger dog seems to have the nose for sniffing these things out and often digs up these treasures. She was mightily interested in my tilling activities, and for two days after I was done, “helpfully” kept digging up the bed! I had dug to a depth of about 30cm and mixed in some compost from my reliable compost heap. Then, it was time to let the bed settle and wait for Mama Sweet Potato Plant to produce her shoots.

Planting the cuttings

Measure the stem against a stick to help you to gauge the depth of the hole needed for planting the cutting.

It took less than a week from the first sprout’s appearance to get my stems of 30cm. Armed with small garden shears and a slim stick, I harvested my cuttings. I removed all but the youngest leaves from each stem and brought them over to the waiting bed. Sweet potato bed, that is. Using the stick to measure the length of the cutting, I poked it into the ground, all the way to my mark of the cutting’s length, before withdrawing it. After that, it was a simple matter of easing the stem into the resultant hole and tamping the earth around it. The next cutting was planted 40 to 50cm away, and so on, down the row.

It’s my plan to plant new cuttings every couple of weeks since we’re growing them for our own consumption. There’s no point in planting a whole lot of plants immediately unless we’re having a BBQ party in a few months, right? Otherwise, it sounds good to have a small harvest every other week or so, without having to store them for too long. Since this is my first time growing sweet potatoes, I’ll have to see how that works out.

Harvest time

Mark your plants to protect them from marauding dogs and other gardeners ;p

Again, my research gave me mixed information as to when sweet potatoes will be ready for harvest. Let’s just say anything from 3 to 6 months. One of the signs, though, is that the stem will thicken and/or the leaves will turn yellow. At that time, you’re supposed to start digging gently, from a distance of almost half a metre from the stem of the plant, so that you don’t accidentally cut or pierce any of the potatoes underground.

Once unearthed, they may need to be washed to remove dirt or clay. Leave to dry well in the sun for a few hours, then keep them in a sheltered area to cure for 7 to 10 days if you’re not going to use them immediately. This allows the skin to toughen so that the potatoes don’t spoil easily before you eat them.

Hm, it’s March now, so it will probably be anywhere between June to September before I see the literal fruits of my labour. Anyway, rest assured, you’ll be getting updates along the way. Cheers!

© 2010 curiousgardener.com All rights reserved.


Share

How to make compost

Fresh compost

A few years ago, I decided to start a compost heap in the garden. We generally have good soil, but over time, it’s been disappearing, due to general erosion and lack of replenishment. Quite idiotically, we’d disposed of leaves and other garden refuse, instead of returning them to the earth, as Mother Nature would. I wish I’d come to my senses sooner, so that we started reducing our waste and began recycling earlier — getting more compost to simultaneously replenish soil and create a natural fertilizer for our plants into the bargain. Well, I can’t change the past, but I can the present and future.

Compost? Mulch? Which is which?

I initially used to confuse these two. They start out the same – organic matter such as cut grass, leaves, twigs or vegetable peelings that you allow to start decomposing.
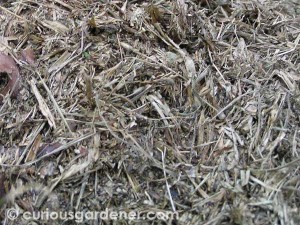
Mulch

Mulch — in this case, organic — is formed when the leaves, twigs, etc. dry out. It refers to the larger pieces of organic matter, like twigs, bits of wood, fibrous husks and leaves that are slower to break down. If you use it at this point, it can be utilized as a weed inhibitor (put a layer over those weeds and they’ll die without sunlight). It also helps to reduce water and soil loss, and regulate soil temperature. And, when it finishes decomposing, it also enriches the soil. Inorganic mulches like shredded rubber or rocks don’t add any nutrients, but they last longer. Go organic!

Compost, also known as humus, is what you get when you just leave everything in the heap to finish decomposing. You’re left with dark brown, crumbly stuff that’s natural, organic, and really good for your plants. Just be prepared to find creepy-crawlies in it when you want to use your compost. Personally, I’m not terribly fond of the big wriggly earthworms, nor the flat cockroach-like beetles and centipedes that startle me with their scuttling, but they’re part of the composting ecosystem, and I need them.

So how do you make compost?

Well, in my case, I just cordoned off an area with a low wall of bricks and instructed everybody to dump cut grass, leaves and veggie peelings in there. Some twigs and thin branches found their way in there too. Not to mention those thick strands of plastic gut that are used in the grass-cutting machines. Okay, not everybody understands what organic matter is, but I still ended up with decent compost. After all, I did my part in putting the things there and Mother Nature did the rest.

My first compost pit, soon to be retired, with a brick retaining wall

There are a couple of problems with this kind of enclosure. You have to remember to mix in the newer stuff with the old, and when you want to get to the compost, it’s right at the bottom and you have to dig through the decomposing stuff and aggravate the creepy-crawlies. It’s not surprising that the heap grew over time, because I wasn’t using much of it for quite a while. That has changed, and the plants around the garden are pretty pleased now that they’re finally getting a taste of the compost that’s been tempting them from afar.

I have since started a newer compost heap. It serves an extra purpose of filling in a bit of a depression left at the site of an old fruit tree, where the old roots have rotted, leaving a dip in the ground. Rather that cart more earth to the spot, I figured I’d let the compost do the job for me. (chicken wire and a couple of sticks and hand tools weigh much less than a wheelbarrow or two of earth!)

I started off with the idea of making a wire bin, but decided to leave one side open, for ease of dumping, and later extracting of compost. One good thing about the wire container is that air will be able to circulate more easily, and this should help the compost to form faster than in my old bin.

My second compost pit, camouflaged by plants so birds won’t fly into the fencing

A big concern for me, though, was that the new wire bin would pose a danger to birds. I didn’t want them to fly into and get caught in the wire, so I moved some pots of Japanese bamboo (Dracaena surculosa) to line two sides, to make it more conspicuous. I suspect that it will become a new stopping point for the birds, especially the brown shrike that stops by to stare fiercely for snacks, I mean insects, on the ground.

Another reason I wanted to make the wire compost bin was because I’d read that it can serve multiple functions. Besides the compost purpose, if you place it at the outer edge of the canopy of a tree, nutrients will feed the tree, I’m guessing, in the form of compost tea (water seeps through the pile and brings the nutrients down to the tree roots). Our mango tree should appreciate my thoughtfulness! The wire fence can also support creeping plants, and I considered using it for climbing veggies until I realized that the same insects that would be attracted to the decaying compost would also be attracted to the growing fruits. Anyway the Japanese bamboo plants look rather attractive there, so I’ll leave things as they are. The fact that the pots are heavy has nothing to do with that decision. Not at all. :)

If you do an online search on compost making, you’ll find that it can be a complicated process. They talk about layering green and dried matter, and monitoring the temperature, and so on. I think in good ol’ sunny Singapore, that’s not too necessary. We get plenty of heat and moisture throughout the year that create the natural conditions for making compost. I haven’t been very diligent about monitoring my first compost heap, and it worked very well by itself. Mother Nature knows exactly what she’s doing…

A word of caution, though. Don’t use compost that hasn’t finished breaking down and drying up. If it’s still greenish, wet and in big pieces, it’s not compost yet, and you may transport live seeds and pathogens that could harm your plants. Be patient and let it break down to the dry, brown/black grainy substance, and you’ve got it made …literally.

Happy composting!

© 2010 curiousgardener.com All rights reserved.


Share

Earth Hour 2010

Remember to make your stand against climate change this weekend, March 27th, 2010.

Switch off your lights for an hour at 8.30pm local time, and if you can, try to adopt more energy-saving techniques in your life. We are responsible for shaping our future on this world. Let’s make it a sustainable one.

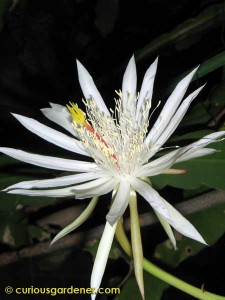
The Keng Hwa flower that blooms only at night. Considered an auspicious flower in local culture, the flower blossoms between 9pm and midnight, and has wilted away by morning.

© 2010 curiousgardener.com All rights reserved.


Share