Still dreaming of pumpkins

The pumpkin plants currently growing in our garden seem to have lost momentum in their growth. The stems aren’t growing as rapidly as before, and the leaves have been getting smaller and smaller. Since Novice Gardener has been successful in growing some pumpkins in her garden – and some of them are growing in pots, as are mine – I had to go and take a look at the pumpkin plants in her garden and try to get some tips to help our plants.

Oh yes, and to pick up a new pumpkin seedling – the Australian Blue! :)

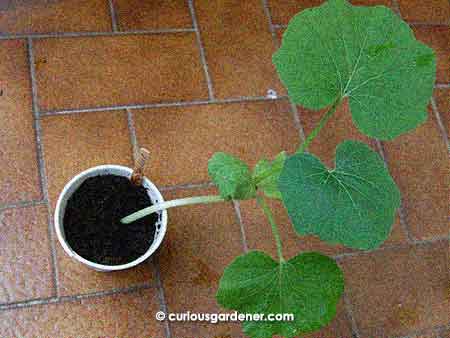
The Australian Blue pumpkin plant adopted from Novice Gardener.

Well, what I saw was a few pumpkin vines happily growing along the length of her garden. Some were indeed growing out of pots, but I had my suspicions of whether they had taken root through the pots and into the garden because they were such long, strong vines.

Closer inspection also showed me that pumpkin vines take root along their stems, as do sweet potato plants, so maybe it didn’t matter whether they’d taken root through the pot after all. What they need is to grow on the ground, not from a pot and restricted from roaming, like I’ve been doing.

I know that The Weeds practice container gardening and have successfully grown a butternut pumpkin, but I am not as vigilant a gardener as they are – I like to provide the best possible conditions and then depend on Mother Nature to get things done in the garden.

So, I am going to clear up Phase 1 of my sweet potato patch that doesn’t seem to have done much other than grow vines and leaves and become a bit of a haven for the birds and our dogs, and plant the pumpkin plants there instead.

I hope we get more pumpkins from this allotment than we have sweet potatoes (nil, unless I unearth some when clearing the patch) – although we have harvested young sweet potato leaves a few times for cooking. It’s not quite worth the amount of land just for those few leaves, though.

Novice Gardener has assured me that pumpkin plants will keep producing lots of fruits, and after observing how they grow in her garden, I believe just a bit more. The proof, though, will be in the fruits. I can’t wait; the first pumpkin from Novice Gardener was really sweet and tasty, and I’d love to have our own supply soon!

© 2012 curiousgardener.com All rights reserved.


Share

It’s bird breeding season

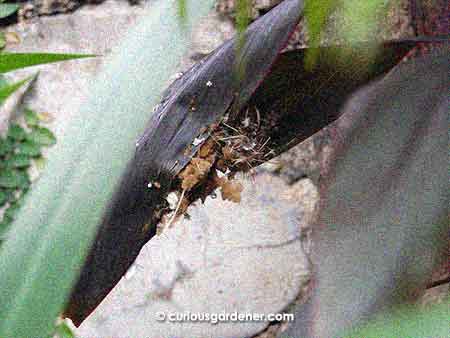
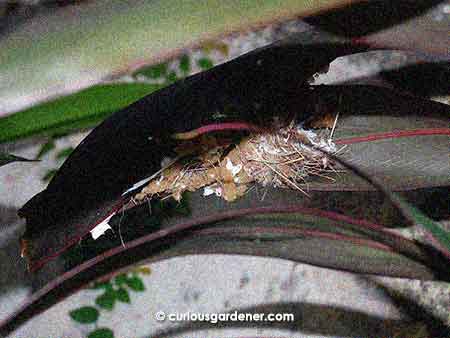
The bird nest attached to the underside of a cordyline leaf

We get a lot of birds visiting the garden every day – mynahs, black-naped orioles, sparrows, pigeons, bulbuls and so on. I barely noticed them until I began to take photos of them. It was only then that I learned their identities and finally managed to distinguish between sunbirds and tailorbirds. Both of them are small and swift, and are easily mistaken for the other.

Well, my mum discovered a nest yesterday, and thought it belonged to the sunbirds, because she saw a pair of small birds swooping around the area in a protective manner. The only way we could get a good look at the nest was to quickly go in and snap some photos, then do some online research – so that’s what we did.

The first thing I did was to look up how sunbirds build their nests. This was what I found at the sunbird page at the Mangrove and Wetland Wildlife at Sungei Buloh Nature Park site:

They (Olive-backed sunbirds) build a hanging flask-shaped nest with an overhanging porch at the entrance, and a trail of hanging material at the bottom end. Materials used include plant fibres, mosses, spider’s web. The nest is lined with soft fluffy seeds (e.g., kapok, lallang grass seeds). The outside of the nest is often untidy and decorated with lichens, dead leaves and seed cases.

The nest was untidy and had white fluffy stuff poking out all over the place, but I wasn’t convinced. Just to be sure, I decided to look up tailorbirds on the same site, and this is what I found:

(Tailorbirds) sew a pouch of green living leaves for their nest. First, the leaf is curled together by twisting spider web strands around it. Then the edges are joined together by making tiny holes on the edges of leaf with their pointed bills. Through the holes, they lace through fibres from bark, cottony seed fibres (e.g., kapok) or spider webs. The opposite ends of these fibres are teased into balls (not knotted together as some suggest).

Looking more closely at the construction of the nest in our garden, I was forced to change my opinion.

Looking closer, you can see how the birds seem to have sewn the nest onto the leaf.

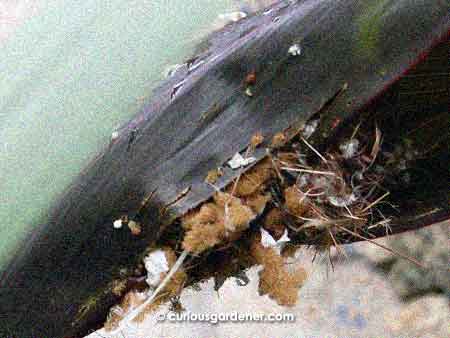
Not only was the leaf curled inwards and pierced in several places like it had been sewn, but it had also been joined with another leaf to complete the nest:

The main stem of the cordyline is on the right. See how the birds joined the two leaves at the ends and padded up the nest to open at the right?

How ingenious is that? The tailorbird lives up to its name by sewing its nest!

My concern about this nest, however, is that cordylines discard their leaves after some time, from the base to the crown. I hope the birds will be done with the nest by the time that comes around.

The big challenge for us will be resisting the temptation to keep checking on the goings-on at this nest…

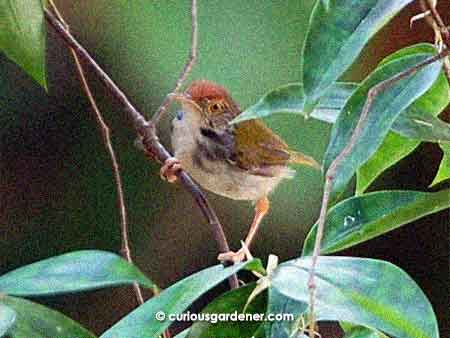
And just so you know what the tailorbird looks like, here it is:

The star of this post: The ashy tailorbird.

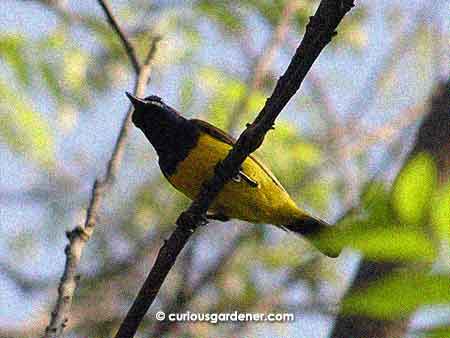
And, just in case you wanted to distinguish the tailorbird from sunbirds:

The male sunbird is identifiable by the black "bib" down its chest.

The female olive-backed sunbird. Juvenile sunbirds look like females, but as they mature, males will get their "bibs".

© 2012 curiousgardener.com All rights reserved.

Share

Drastically prune mulberry plants to make them bear fruits

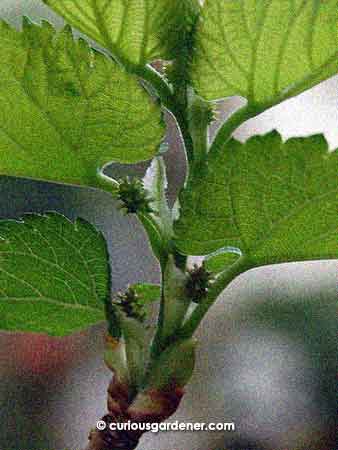
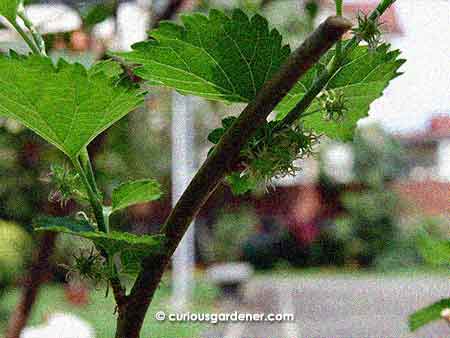
I don't usually spot mulberries when they're this early in development because I don't expect to see them - but I was, this time!

Alright, Novice Gardener, you can’t call yourself a novice any more when you’re giving out sage advice!

Following your suggestion, I snipped off all the leafy stems from two of my - relatively small – potted mulberry plants, and while new leaves started growing within days, it took less than two weeks for fruits to start forming! They’re growing in clusters of threes and fours, and quite indiscriminately along all the branches.

My lesson did not stop there.

I also yanked out the one plant that had taken root through the flower pot and into the garden, which had grown into a sizeable bush. Seeing the mulberry tree in the neighbourhood had spurred me into taking action, because I do NOT want that big a mulberry plant growing here just yet. As gentle as I tried to be, though, I accidentally broke the main tap root when I pulled the plant up.

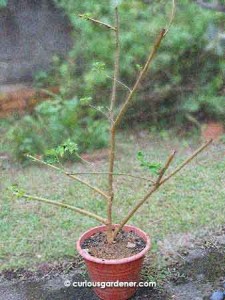
The re-situated, drastically pruned plant, aka Mr Botak, a couple of days after being replanted. It's difficult to imagine that it went from this to a madly-fruiting plant within days!

I must remember to check that the plant doesn’t regenerate from that bit of root left in the garden…

Since the bush was quite big, with several long stems that reminded me of the Whomping Willow from Harry Potter, I pruned the branches quite drastically. As an afterthought, I decided to propagate those pruned branches.

What can I say, I really hate to throw good plants away!

The main part of the plant was stripped of all remaining leaves to give it a chance to focus its strength on growing roots instead of trying to support several leaves without a proper root system, and it was planted in a bigger pot. It looked very sad – bare branches outstretched like an old abandoned Christmas tree – and I unconsciously named it Mr Botak (bald). Well, it lived up to that name for less than a week before new leaves started sprouting everywhere. By the time the fourth set of leaves opened up on the new leaf stalks, there were little fruits starting to form, too, on most of the new stalks. A rough count gave a total of over 50 potential fruits!

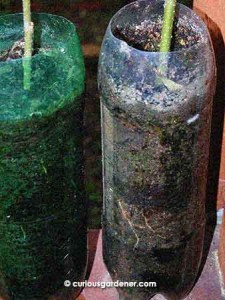
See the thick roots growing? This was within a week of sticking the cuttings in.

The cuttings also surprised me, but not by the way of fruiting. As they were from rather matured, long stems, I cut them into lengths of about 40cm each. I got seven cuttings in total. The fattest ones were stuck into recycled PET bottles while the thinner ones were stuck in tall flower pots. There was no particular reason for this; just the availability of ready planting locations – they had formerly been in use but were now vacant. Again, within a week, the fat stems started budding with new leaves. That’s not surprising. What was intriguing was that the new roots were visible through the plastic bottles, and boy, were they thick, strong roots! Why was I even worried about their not surviving?

I can just imagine that if these cuttings already have such good roots, Mr Botak, with part of a thick tap root intact, must already have a good root system in the bigger, better home!

And before you say it, Novice Gardener, no, I did not do anything to beef up the soil the plants are currently growing in. It’s kind of annoying that mulberry plants only produce more leaves when you fertilize them, so not only did I not add any fertilizer to the soil in that pot, it’s also old, recycled soil. Can we say that mulberry plants thrive on tough love? :P

Just a couple of the clusters of fruits growing on Mr Not-so Botak Anymore...

So, I see the light now. Massively prune mulberry plants and don’t fertilize them if you want them to bear fruits. Finally, my dream of having a bowl filled with chilled mulberries on a hot day looks like it’s going to be possible after all! 8)

© 2012 curiousgardener.com All rights reserved.
Full-Featured Hosting for Your WordPress Blog - GoDaddy.com

Share

Invasion of the thrips

I was checking the mass of snake gourd and angled loofah vines for fruits yesterday when I uncovered a loofah with a cluster of insects on it:

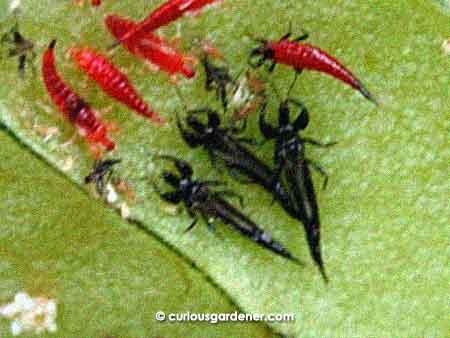
A congregation of what could be thrips, with white things scattered around that could be eggs or discarded exoskeletons or excrement ... who knows?!

My first instinct was of course to annihilate them, because they looked to be feeding on the loofah. Then curiosity/common sense kicked in and I decided to snap their photo and try to find out if they’re beneficial or not.

The closest I could get was that these were thrips. They have tapering bodies that to me look a little scorpion-like, but what sealed the identification was the little, elongated heads and what look like Popeye-like heavy biceps on the first set of legs. And they are rather small – only about 1cm long, but easy to spot because of their stark, shiny black or red bodies.

Eh, an entomologist I am not, and I don’t really enjoy examining insects in great detail; I just want to make sure I’m not killing off a potential garden ally.

Wanted a closer look? This is as good as I could get 'em. Ew.

I did try to give them the benefit of the doubt by finding out what they feed on. It didn’t look good for them. According to the thrips page on Wikipedia:

Thrips species feed on a large variety of sources, both plant and animal, by puncturing them and sucking up the contents. A large number of thrips species are considered pests, because they feed on plants with commercial value. Some species of thrips feed on other insects or mites and are considered beneficial, while some feed on fungal spores or pollen.

This is not the first time I’ve encountered these insects in our garden. The last time I saw them was when I was dismantling an old bamboo trellis. These insects were living in the hollow part of the sticks, and back then, I didn’t have my annihilation instincts under control – I immediately blitzed them with insecticide before realizing I should have identified them first. Too bad there were no survivors for me to check then.

The current lot of inhabitants managed to get away while I was doing my research, so no spraying went on this time. However, if I do see them again, I think I’ll use the soap suds on them. After all, they looked to be sucking sap from the loofah. At the least, the suds should immobilize them long enough to drip away with the suds. I wish, anyway.

So, friend or foe? Foe, I think!

© 2012 curiousgardener.com All rights reserved.

Share