Growing beets in Singapore (Part 1)

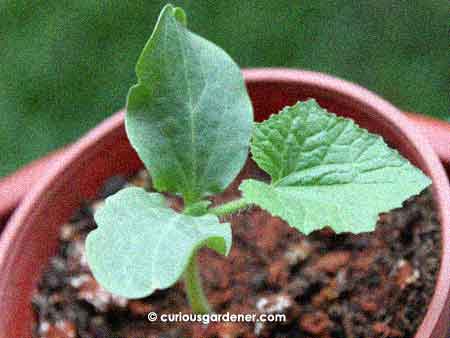
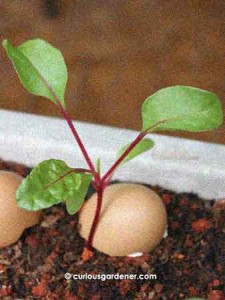
The young beet plant being held upright by an accommodating egg shell!

I’m growing beets for the first time, thanks to The Weed, who shared some seeds with me. They were the oddest seeds I’d ever seen – none of them the same, each looking dry and extremely bumpy! And then I discovered that those were actually dried fruits, essentially several seeds in a cluster. That explained why beets need to be thinned out as they grow…

Prior to this, I’d never considered growing beet root. Firstly, I have it in my head that they aren’t tropical fruits… er, roots… and secondly, I have never eaten beets before and don’t know if I’ll like them. But the overriding factor in growing them now is that I can’t resist the challenge of trying to grow something edible from seed.

So, I planted three seeds in late March. It seemed safe to start sowing new plants then, because the dry monsoon period seemed to be over, and we were getting more moisture and fewer plants were wilting.

The odd-looking beet seeds..

The seeds germinated, and grew in three clusters in the little pot. They seemed to stay at the seed leaf stage for quite a while, so I decided I would transplant them then. I prepared a planting trough – filled with a mix of organic compost, burnt earth, coffee grounds and volcanic soil – a few days prior to the transplant. In organic gardening, it’s suggested that you let the soil settle and rest before you start planting in it. I’m usually too impatient for this, though. Besides, weeds start growing anywhere they find available conditions. I’m not giving them an open invitation in good soil!

When the time to transplant the seedlings came, I found that they separated quite easily, so instead of growing three clusters that I would have to thin out later, I had about nine seedlings to play with! Of course, this posed a little problem, as I had to plant the seedlings closer together than planned. I guesstimated the size they could grow to, then positioned the seedlings in a staggered pattern in the planter.

I also decided to plant the seedlings a little deeper to give their stems more support – and because the photos I’d seen of them growing showed the cluster of leaves sticking out of the soil, with no sign of a stem. I did that, but a few of the seedlings didn’t seem to appreciate it and grew their stems a bit more anyway. Of course, they then became rather top-heavy as the true leaves grew, and have been leaning over every which way when they’re watered or when the wind blows. I had some washed egg shells that I was going to use as fertilizer out in the garden, but decided to use them to prop up the leaning beet plants first. They seem to be doing the job well, and a few of the young plants are starting to stand up on their own again. I still think I’ll top up the soil level a bit so it’s closer to where the leaves branch out.

This plant broke off along the stem when it had the first two true leaves coming out. Instead of discarding it, I poked it back, and am amazed it still seems to be growing!

On the not-so-good side of things, a couple of the seedlings leaned over so much that they got a kink in their stems, and eventually broke off at the bend. I was upset about the first one and tossed it out into the garden, but for the second, I poked it back into the soil to see what it would do. Would you believe it seems to be still growing after almost a week? At least, the leaves aren’t dying …yet. I don’t know about you, but I just have fun with these little experiments!

Another couple of seedlings died from dehydration. The planter is in a sunny location, and all it took was a single, hot afternoon with not enough water to kill the seedlings. I wish I had realized just how hot that spot was before I left the newly transplanted seedlings there. I shifted it for a few days to give the seedlings a chance to establish themselves before putting it back – and I’m being more careful to water them more frequently, especially on hot days. Thank goodness the others recovered and are still growing, but we’re now down to six plants.

I believe I read that it takes 60 days for beets to mature, so the lull begins now. I hope the plants just keep growing as they should and no calamities happen to them.

© 2012 curiousgardener.com All rights reserved.


Share

Winter melon beginnings

The original winter melon plant: Just 40cm high and starting to flower again.

Well, it looks like my first winter melon plant has found its second wind. After producing the Little Monster, about 70% of the vine died out, making me worry that it would not be able to catch its breath and continue growing. The leaves have been small, compared to what the vine used to grow, but with each new one, they have been getting a little bigger.

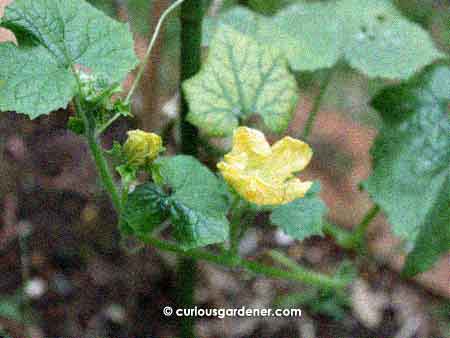
The plant has finally started producing male flowers again, so I am heartened that we could see more fruits growing here sometime soon.

The new winter melon sprout grown from seeds from the original plant.

Generation Two has also started growing. One seed I saved from the harvested fruit has germinated and kept on growing so far. Maybe more will join it! 8)

© 2012 curiousgardener.com All rights reserved.

Share

How to spot a caterpillar before it eats the entire plant

The usual culprit wreaking havoc on the caladiums...

Learn from my hard-won lessons. It’s caterpillar season again, and short of frequent examinations of the undersides of all the leaves of our most susceptible plants, it’s really difficult to find and remove offending caterpillars until they’ve already done significant damage to our plants.

As I’ve bemoaned in the past, our caladiums seem to be a favorite meal of caterpillars. It must be the nice, big juicy leaves that attract the butterflies or moths that lay their eggs on the plants. When I can, I turn the leaves over to look for those small, round caterpillar eggs. Oddly enough, they’re easier to see than hatched caterpillars are. Once the caterpillars are out, however, it’s almost impossible to see them as they have great colour camouflage to blend in with their surroundings.

It struck me recently how I could possibly spot the caterpillars a little sooner…

If I were Grissom from CSI, I’d tell you to look for the evidence:

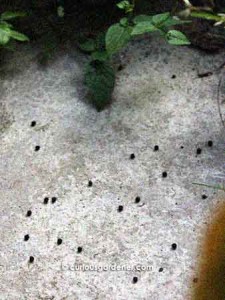
Looks like someone has dropped papaya seeds on the ground, but nope, those are the droppings from a matured caterpillar!

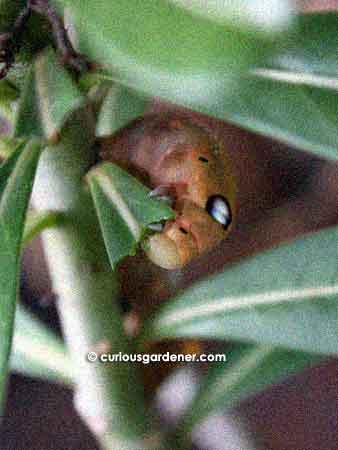
Our adenium plant has been the latest victim of at least one voracious caterpillar. Lucky it's a hardy plant.

…caterpillar droppings.

Small and young caterpillars leave tiny black dots of their droppings peppered on the leaves beneath where they’re feeding.

Bigger caterpillars leave more noticeable evidence, especially on the ground. By the time you see droppings of this size, however, it means the caterpillar is pretty darn big, and has probably already gone into cocoon mode – and you may not have much of a plant left!

Anyway, I hope this tip helps you to avoid major caterpillar problems.

© 2012 curiousgardener.com All rights reserved.

Full-Featured Hosting for Your WordPress Blog - GoDaddy.com

Share

Snake gourd surprise!

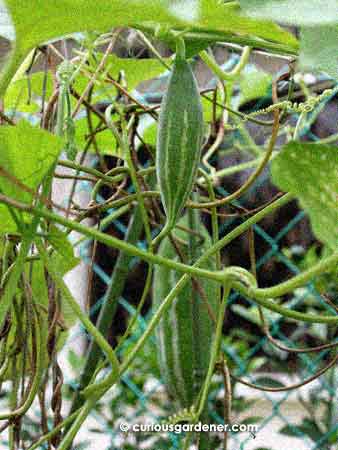
The young snake gourd in the foreground, and the bigger gourd that appeared so suddenly, in the background. What a difference in sizes!

There are times when I feel like a blind person who can suddenly see. I may not check on all my plants on a daily basis, but I do try to keep abreast of all the changes and goings-on. So, when I was checking in on the young snake gourd I told you about a couple of days ago, I had the shock of my life when I suddenly noticed a bigger gourd growing not 15cm away from it! I let out an exclamation that isn’t very PG and must have made our neighbor laugh, because this was not a small fruit – it was close to 20cm long and as you can see, is not a skinny thing. How could it have grown without my seeing it until now? Honestly, seeing it so suddenly was like it appeared there like magic! I even checked on my earlier pictures to see if it had been there, but it wasn’t.

The bigger fruit has white stripes as opposed to the pale green of the young fruit, and touching it to test its “sproing” factor left a slightly sticky residue that Curious Mama thought smelled like pandan, but I thought smelled like raw peanuts. She usually has a better sense of smell than I do, so I’ll concede this point to her…

A closer look at the bigger snake gourd.

The young snake gourd that I mentioned previously is getting bigger, too – it’s about 2cm longer than at last report, and now has another little sibling to keep it company …that I have seen, anyway. Who knows how many other little fruits are hiding from me right now? 8O

On the whole, the snake gourd vine is growing like wildfire. It has taken over the long bean trellis completely, and has climbed along the fence and reached out to join the angled loofah on its trellis. It has also tried to climb over the neighbor’s lime plant, but has been firmly turned back to our side of the fence. I guess the neighbors prefer keeping their lime plant unsmothered than the possibility of getting free snake gourds! (the unwritten rule of neighbours: you get to keep what grows on your side of the fence)

As for the big surprise snake gourd, the only explanation I can think of is that it must have been hidden among the leaves until it got so big and heavy that it had to dangle down, and as it got heavier, it got low enough to finally be seen by yours truly. What a nice surprise!

© 2012 curiousgardener.com All rights reserved.

Share