Growing the green snake gourd (Part 1)

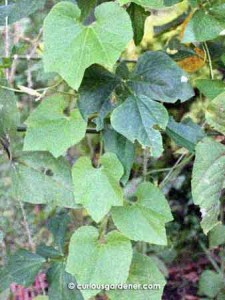
Easily identified, the snake gourd leaves are the lighter ones while the long bean plants have darker green leaves.

My poor green snake gourd vines had a shaky start when I failed to transplant the pair of them fast enough, each becoming root-bound in its first small 6cm flower pot and producing single flowers while still very small. I hastily shifted them to bigger pots because I still didn’t have a trellis ready yet. The plants did what they do naturally, and simply latched onto any and everything around, climbing up to my hanging potted plants! Again, I was concerned when I had to detach and disentangle them when I finally brought them to the completed trellis. The trauma was enough to kill one plant, and, expecting the other to die off as well, I sowed my long bean seeds at the same trellis.

The long bean plants grew and prospered, and the poor snake gourd plant sat there, probably reorienting itself to the new surroundings. The initial stems looked weak and started dying off, but in true plant tenacious fashion, once settled in, the vine grew new stems that were stronger than ever, and began to compete with the long bean plants!

Uh oh, I thought, this plant could be trouble…
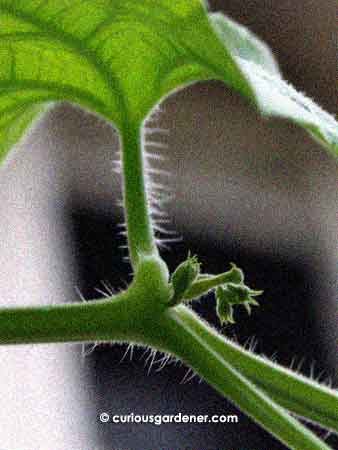
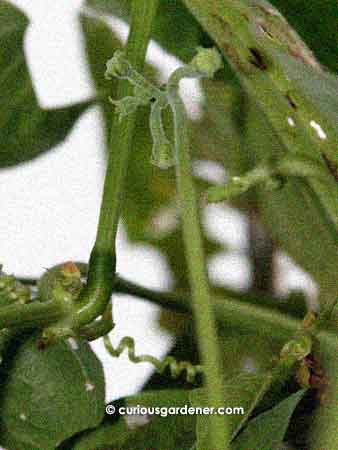
Lots going on at this juncture - a cluster of male flower buds next to an upthrust female flower bud, and probably the beginning of a new stem growing out.

With a fresh and strong green stem, the vine climbed to the top of the trellis, wound itself through the long bean plants, then began to reach for more space to grow. I put in a string linking that trellis to the other one about 1.5 metres away, and trained it onto the string. The tendrils tend to branch out sideways to anchor the plant, and it fought me as I tried to keep it on the straight and narrow. However, I persevered.

When the vine was halfway across the string, I noticed flower buds beginning to form at each leaf node along that stretch. One node had a cluster of male flower buds while the next one had a male cluster and a single female bud, and kept alternating that way!

I tried to trace the vine backwards through the cluster of long bean vines at the peak of the trellis – not too difficult to do as the snake gourd vine is lighter green and hairy in comparison. What I found was a more developed cluster of flower buds, where the male flowers were on an extended stalk!

Male snake gourd flower buds getting ready to bloom.

Just like other cucurbitaceae plants, male flower buds grow in a cluster and take turns to bloom. So, even though you see the group of buds, only one will open at a time. It looked like we would see a number of male flowers begin to bloom as several of them on the older part of the vine began to prepare themselves as the flower stalks grew longer and the buds began to swell.

After a few days, however, I noticed that something different was happening at one of the newer clusters of male and female flowers. Instead of the male flowers developing and growing out on the longer stem, the female bud began to grow while the male buds remained stagnant. So the anticipation is now rising to see the blooming of the first female green snake gourd flower.

I’m also expecting this vine to grow rather vigorously, based on how it’s already developing. The trellis will probably not be able to contain the vine, and I wonder if the neighbors will get freaked out by the gourds if I let the vine grow onto our fence – I’ve seen pictures of snake gourds, and they really do look like snakes! 8O Stay tuned…

© 2012 curiousgardener.com All rights reserved.


Share

The tenacious jicama plant

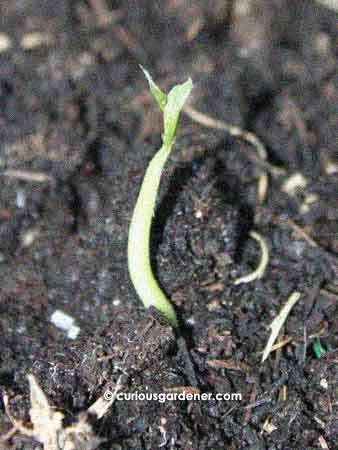
Before: A nice, healthy jicama sprout with seed leaves about to open.

I’ve been proclaiming how hardy the jicama plant is recently, and now I have a new reason to say this. Remember I said I’ve planted the next generation of jicama plants? I had so many sprouts that after planting our first-ever bed of jicama plants, I had extras to give away. However, my pride in my jicama bed got a stab in the gut when a snail or snails ate two of the little sprouts. They had barely opened their seed leaves when they were rudely beheaded, leaving just a few millimetres of stem peeking from the soil.

I’ve tried this before with other plant sprouts, and I decided to do it again – I left the beheaded plants where they were to see if they could survive. I had my fingers crossed, because I knew that all of the sprouts planted had good tap and developing side roots, which would give the plants a good advantage.

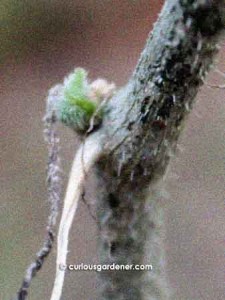
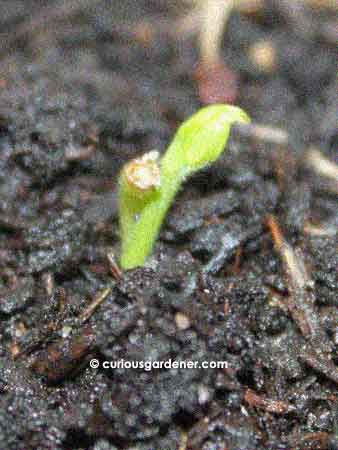
After: See the beheaded stem with the new leaves sprouting!

Four days later, a new stem pushed its way out from one of the beheaded plants, and what a healthy looking stem it is! My fingers are crossed to see our first complete bed of jicama plants growing, and to harvest them in 18 to 24 months from now…

© 2012 curiousgardener.com All rights reserved.

Share

Winter melon revival

The new leaves at the top of the vine, contrasted against one of the old, brown leaves in the right foreground.

I’ve been very anxiously hovering around the winter melon plant. After harvesting the first monster baby, the plant seemed to be exhausted. It stopped growing new leaves, the vine didn’t get any longer, and the leaves that were still on the plant were first dusted with powdery mildew, then became the meal of hairy caterpillars.

All in all, I expected the poor vine to simply give up. However, I refused to give it signals that I was giving up on it. I first gave it a good dose of high-nitrogen fertilizers to prompt it to start growing more leaves, then resorted to a dose of seaweed solution, then fish emulsion. I was going to dig further into my arsenal of fertilizers but, finally, saw new leaves starting to grow.

The first set showed up at the top of the vine – a new offshoot vine – that the caterpillars sampled a little. The second set of leaves began near the base of the plant – two nodes are sporting tiny budding leaves – so I expect the vine is going to branch out in the near future.

The budding leaves near the base of the winter melon vine.

Now that I know that the vine is going to keep growing, I can decide on a course of action for the trellis. I haven’t completely dismantled the first, insufficiently-built trellis, nor have I completed the second, bigger and hopefully strong-enough trellis that is currently looming above the first.

Well, the second trellis is only half built. Even though it’s an A-frame, that alone will not suit the winter melon’s needs. I think this plant needs more horizontal growing space, so I’ll probably set up another A-frame trellis nearby and join them at the tops. I hope that will be just what the plant needs to thrive. It will be such a pleasure to see the vine spread out and fruit profusely (not just in my dreams), and see those fruits dangling from the extended trellis.

Yes, I can see that happening, so as Captain Jean Luc Picard always says, make it so.

For the record, here is our first fruit, affectionately known as the Little Monster:

The harvested winter melon looking more like a watermelon...

…all 2.83 kg of it! I find the shape rather unusual for a winter melon, but it was a First Fruit, and those are usually test runs for the plants. Now that I can anticipate a definite future for the winter melon plant, I wonder whether the following fruits will be more round or elongated?

© 2012 curiousgardener.com All rights reserved.
$1.99 Domains* at GoDaddy.com

Share

Jicama: Generations…

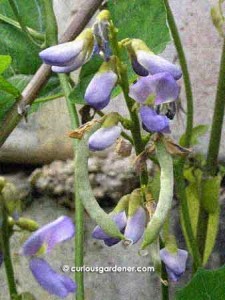
I think jicama flowers are among the prettiest I've had growing here. They are pictured with some developing bean pods.

Let’s take a walk down memory lane, of two years or so back. I wanted to try growing jicama or bangkwang plants, and started that venture by planting a baby jicama I’d seen at the market that had a bit of stem and leaf attached to the tuber. That started growing, and eventually flowered and provided me with seeds to start new plants with.

We’ve already harvested one of those grown-from-seed plants, and are waiting for the rest to grow bigger.

What I had forgotten about was the mama plant, which was growing along a wall that gets mostly afternoon sunlight. That was my initial edible garden, but has since made way for the Red Lady papaya trees. All I have left along that stretch are edible ginger plants interspersed with lemongrass and a few ornamental plants. The jicama was completely forgotten.

Then, last week, I noticed a plant twining itself up a dead cosmos plant. I recognized the leaves as those of the jicama, and traced the stem down and through the grass and weeds to the source. Imagine my surprise at seeing…

Peeping through the earth and weeds was the biggest jicama we've seen growing in our garden!

…the mother of all jicamas – literally!

This mama, although only the top is showing, looks much bigger than the first harvested jicama. If I were to guesstimate, I’d say it’s almost 20cm across and probably 10cm high. That’s pure guesswork, mind you. However, from what we can see from its top, it seems to be slightly bigger than the jicamas sold commercially. That would make those commercial ones between one to two years old. Wow.

Do I want to harvest this mama plant yet? I’m tempted, because it looks huge!

This is the lazy way of germinating seeds, but it's also cool because you can see how they germinate!

Considering how long it takes to grow a decent-sized jicama, I decided to plant even more seeds. These plants usually produce a lot of pods, but I normally remove them so that the plants channel their energy into developing the edible tuber. The pods also take quite a while to mature, so I only allow one or two to develop at a time, if at all.

So, when our gardeners did their usual thing of accidentally severing the stem of the jicama plant I had been saving my pods on, I was really upset.

Okay, I can’t blame them too much because I’m lousy at weeding. I only remember to go weed around the important plants towards the end of the month because I know they’ll be coming soon.

It’s a mighty good thing this plant is so tenacious. It just keeps growing a new stem and leaves, and troops on. Gotta love it.

So my seed pods weren’t able to grow to full maturity, but they dried out and I decided to take a look at the seeds inside. You never know if they’d be ready or not, right? On splitting the pods open, I found that not all the seeds had grown very big. Crossing my fingers, I selected the biggest ones and buried them in a cup to hopefully germinate. Less than a week later, I saw tap roots beginning to show! So, the next generation of jicama is underway; it will just be a long time before we see results.

I think we’ll leave the mama jicama alone and see how much bigger it can grow.

© 2012 curiousgardener.com All rights reserved.

Share